Storage Configuration
Baan stores article bodies, images, uploaded media, and generated files such as llms.txt in a pluggable storage backend. SQLite/libSQL stores operational data such as settings, users, sessions, article metadata, the article index, API keys, and rate-limit counters.
You can switch between storage providers from the admin panel without rebuilding the app. The System settings flow can copy existing content to the new provider before Baan starts using it.
Providers at a Glance
Section titled “Providers at a Glance”| Provider | Environments | Best For |
|----------|-------------|---------|
| local | Self-hosted only | Simple setups, development, single-server deployments (local filesystem) |
| gcs | All | Google Cloud users; integrates well with GKE, Cloud Run |
| s3 | All | AWS users; widest ecosystem and tooling |
| r2 | All | Cost-conscious teams; free egress from Cloudflare’s network |
How to Switch Providers
Section titled “How to Switch Providers”- Go to Admin → Settings → System
- Select the new storage provider and enter credentials
- Click Migrate to copy existing content to the new location
- Save — Baan starts using the selected provider after the migration/switch completes
No rebuild is required. Runtime switching is handled through the provider value saved in the database.
Local Filesystem
Section titled “Local Filesystem”Files are saved to the content/ directory in the project root.
No environment variables needed. The provider is selected during setup and stored in the database.
When using Docker, mount the content/ directory as a volume so files persist across container restarts:
volumes: - ./content:/app/contentGoogle Cloud Storage (GCS)
Section titled “Google Cloud Storage (GCS)”Step 1 — Create a Bucket
Section titled “Step 1 — Create a Bucket”- Go to console.cloud.google.com → Cloud Storage
- Create a bucket in your preferred region
Step 2 — Create a Service Account
Section titled “Step 2 — Create a Service Account”- Go to IAM & Admin → Service Accounts → Create Service Account
- Give it a name (e.g.
baan-gcs-access) — the service account ID is auto-filled
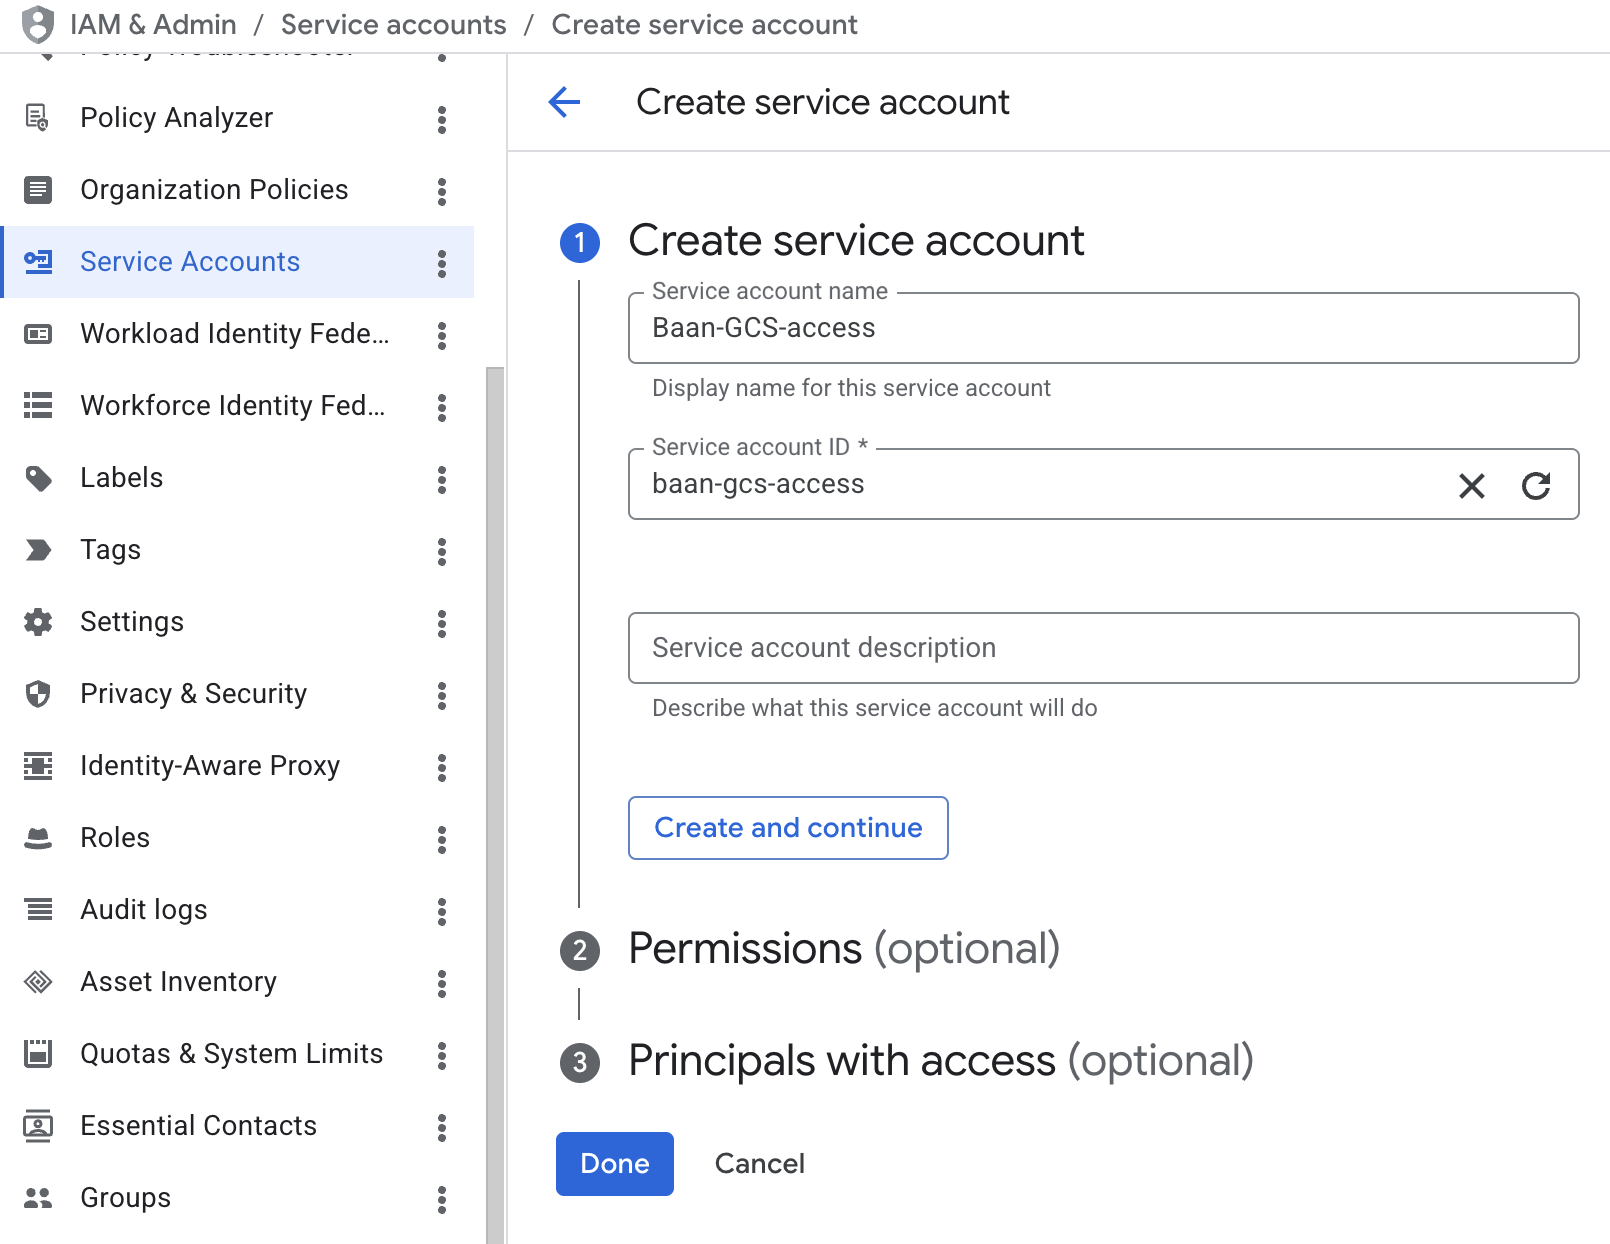
- Click Create and continue
- Under Grant this service account access to project, select the role Storage Object Admin
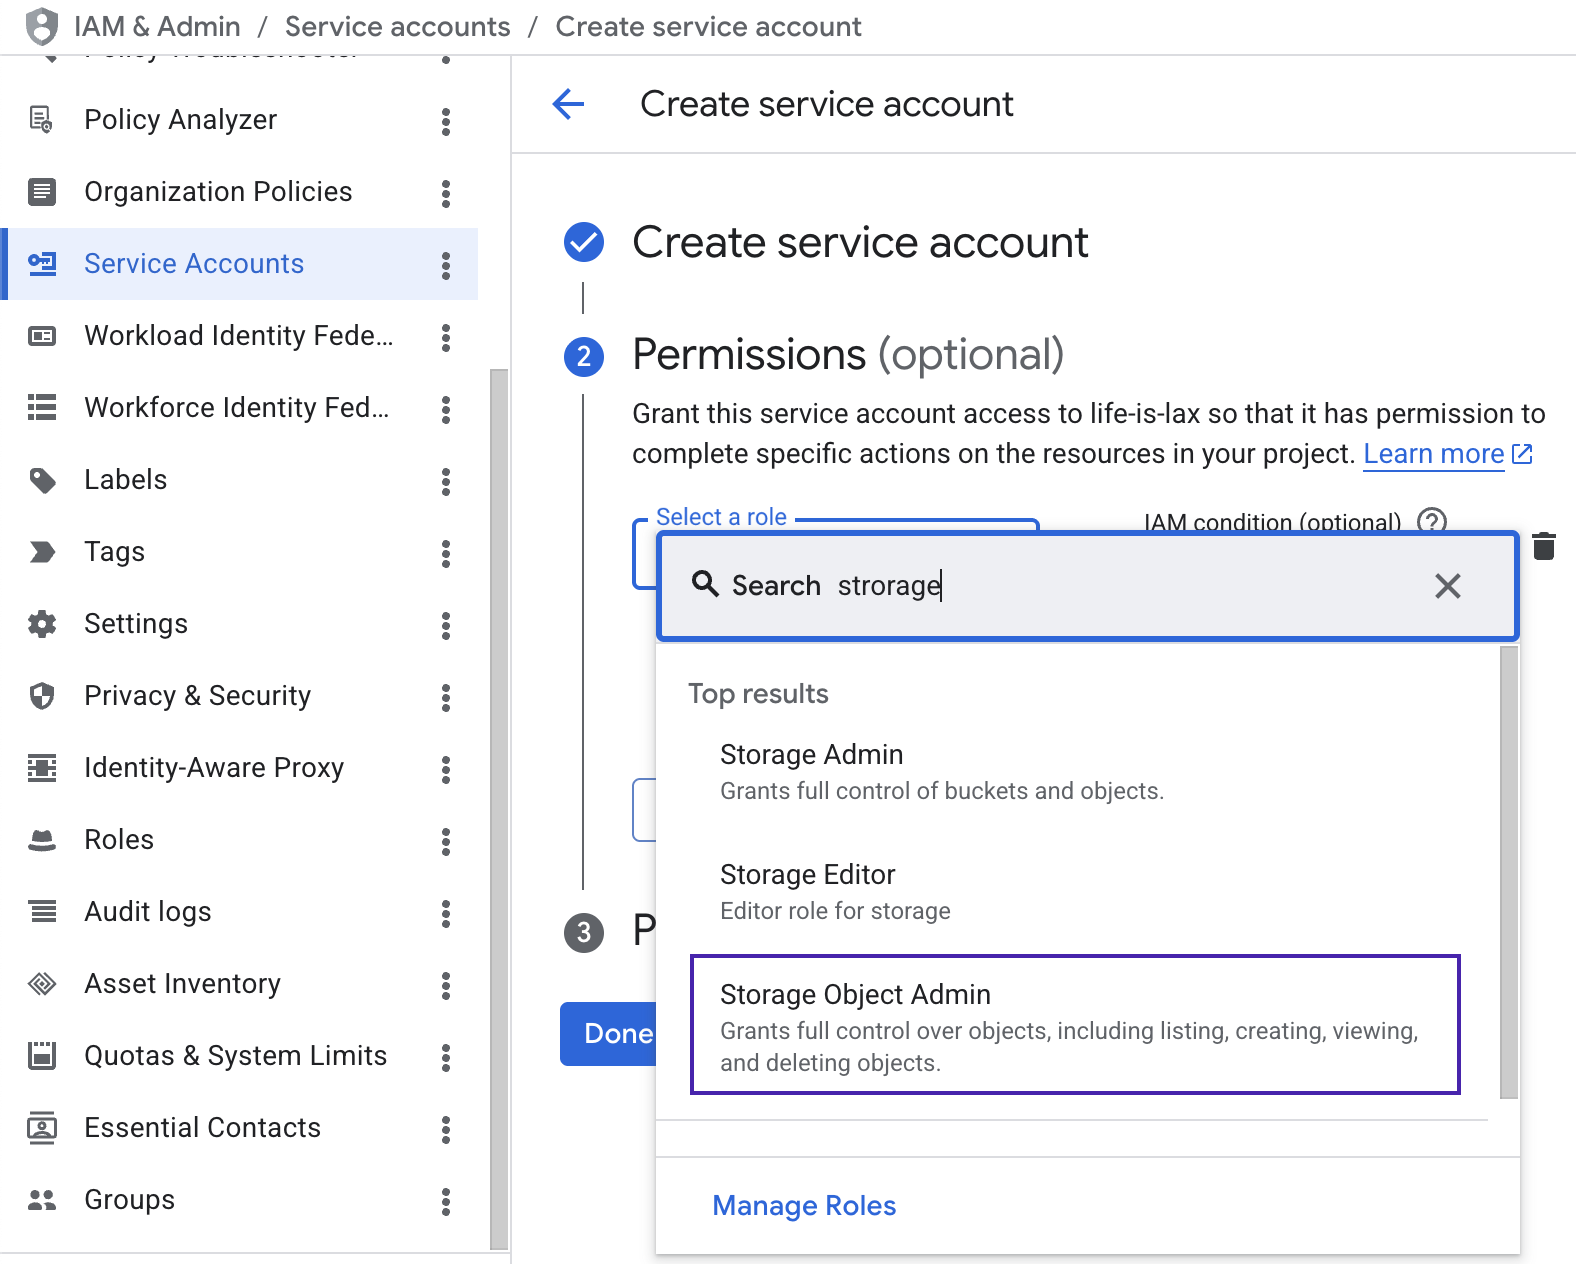
- Click Done
Step 3 — Create a JSON Key
Section titled “Step 3 — Create a JSON Key”- Open the service account you just created → Keys tab
- Click Add Key → Create new key
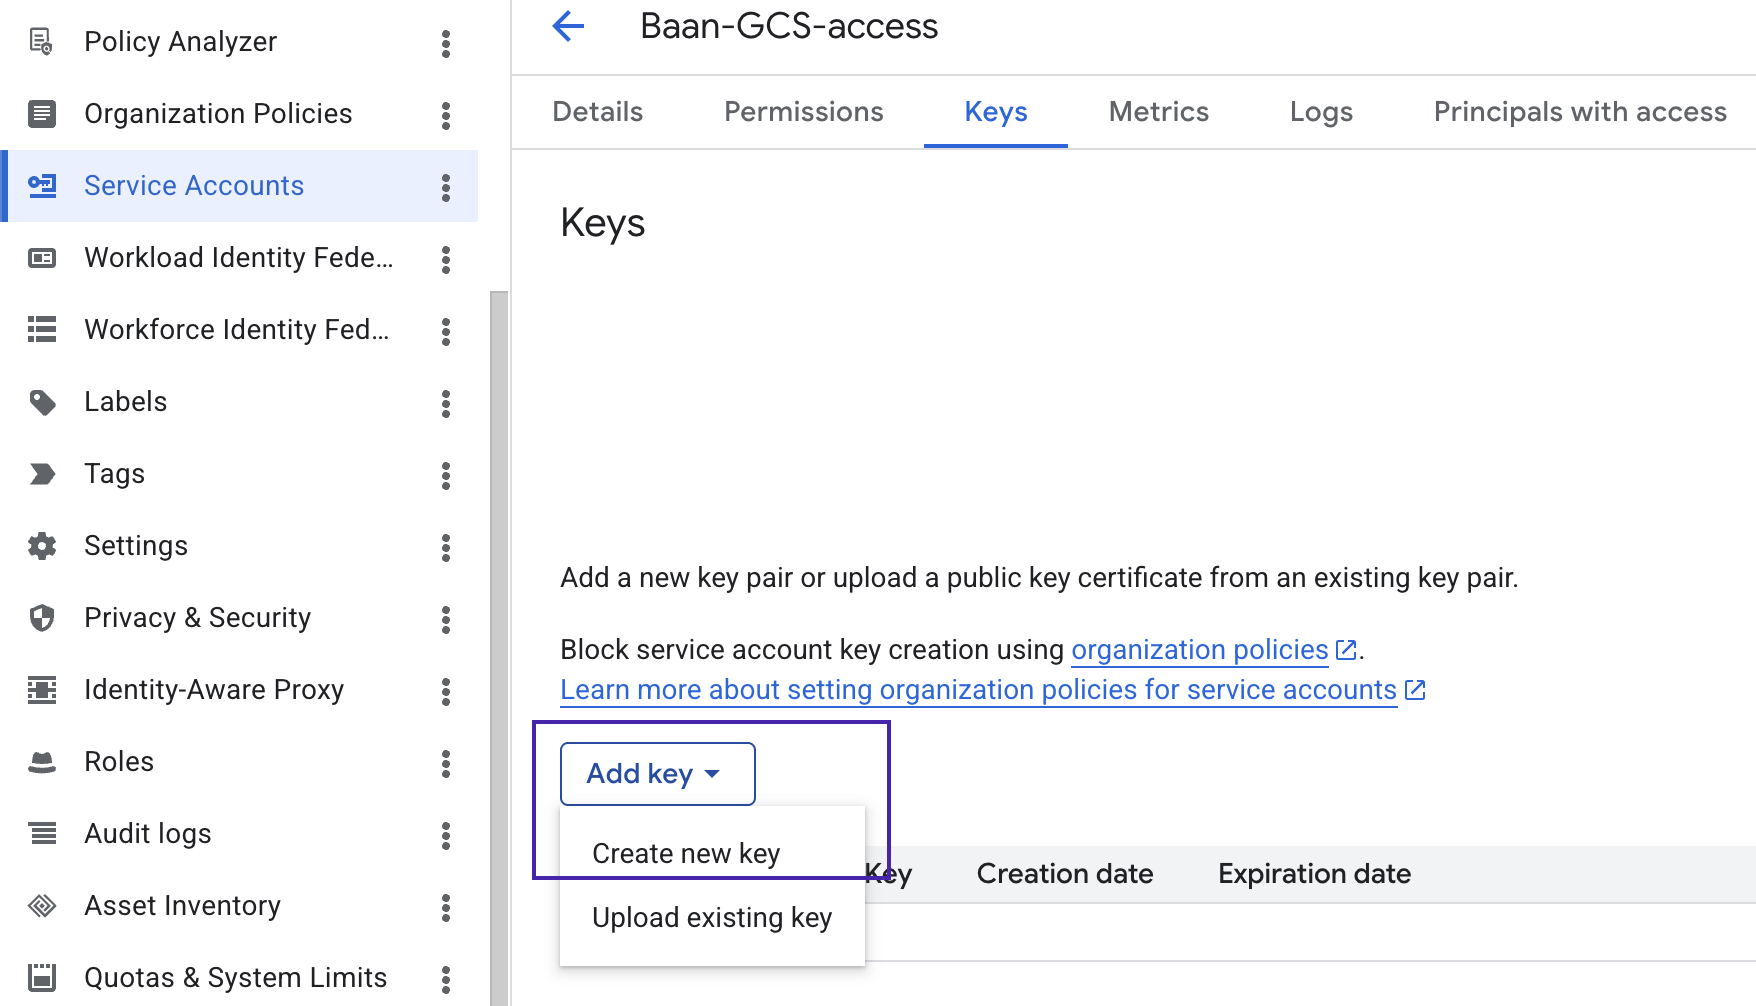
- Select JSON (recommended) → Create
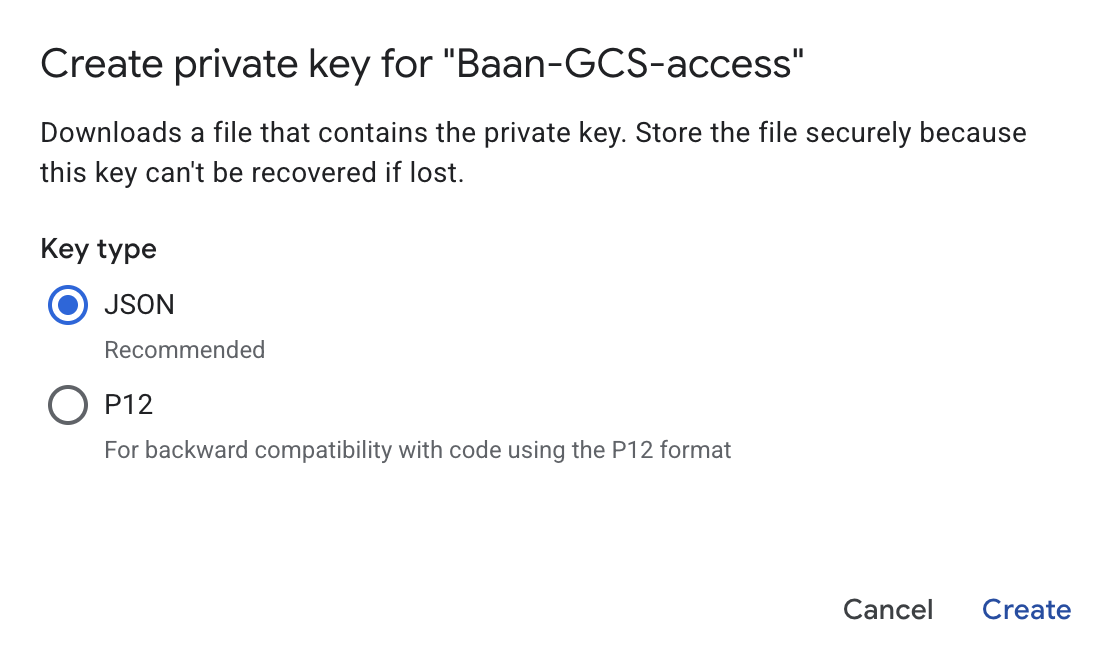
- The JSON key file downloads automatically. Store it securely — it cannot be re-downloaded if lost
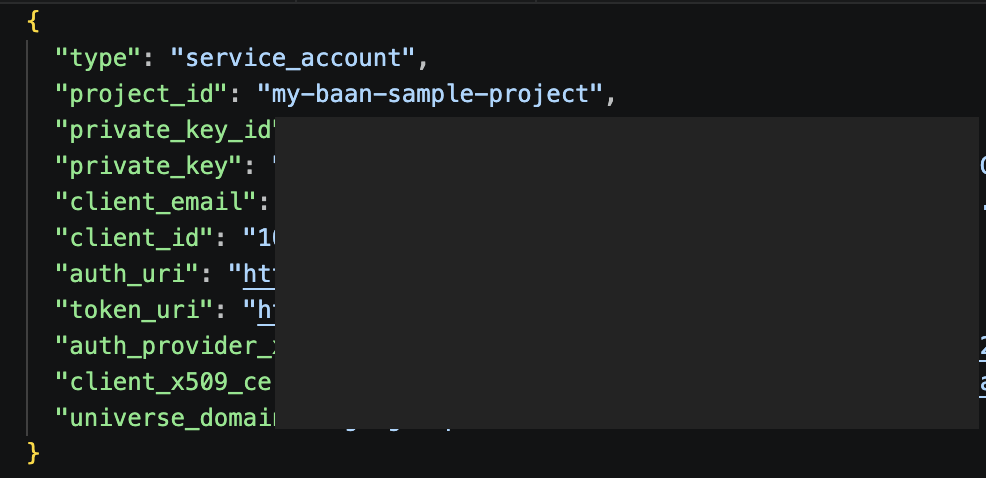
Step 4 — Base64-encode the Credentials
Section titled “Step 4 — Base64-encode the Credentials”Baan reads the credentials from a single environment variable, so the JSON file must be encoded as one line.
Option A — Encode in your browser (no upload, no storage):
Paste this into GOOGLE_CLOUD_CREDENTIALS_BASE64.
Option B — Encode from your terminal:
base64 -i service-account.json | tr -d '\n'On Linux, use base64 -w 0 service-account.json instead.
Environment Variables
Section titled “Environment Variables”GOOGLE_CLOUD_PROJECT_ID=your-project-idGCS_BUCKET_NAME=your-bucket-nameGOOGLE_CLOUD_CREDENTIALS_BASE64=base64-encoded-service-account-jsonThe GOOGLE_CLOUD_CREDENTIALS_BASE64 value is the entire contents of the JSON key file, Base64-encoded as a single line with no line breaks.
Amazon S3
Section titled “Amazon S3”Create a Bucket
Section titled “Create a Bucket”- Go to the S3 console → Create bucket
- Choose a region close to your users
- Keep “Block all public access” enabled (Baan accesses files directly, not via public URLs)
Step 1 — Create a Custom IAM Policy
Section titled “Step 1 — Create a Custom IAM Policy”Create the policy first, then attach it to the IAM user in Step 2.
- Go to IAM → Policies → Create policy
- Switch to the JSON tab and paste the policy below — replace
your-bucket-namewith your actual bucket name
{ "Version": "2012-10-17", "Statement": [ { "Sid": "BaanS3Access", "Effect": "Allow", "Action": [ "s3:GetObject", "s3:PutObject", "s3:DeleteObject" ], "Resource": "arn:aws:s3:::your-bucket-name/*" }, { "Sid": "BaanS3List", "Effect": "Allow", "Action": [ "s3:ListBucket" ], "Resource": "arn:aws:s3:::your-bucket-name" } ]}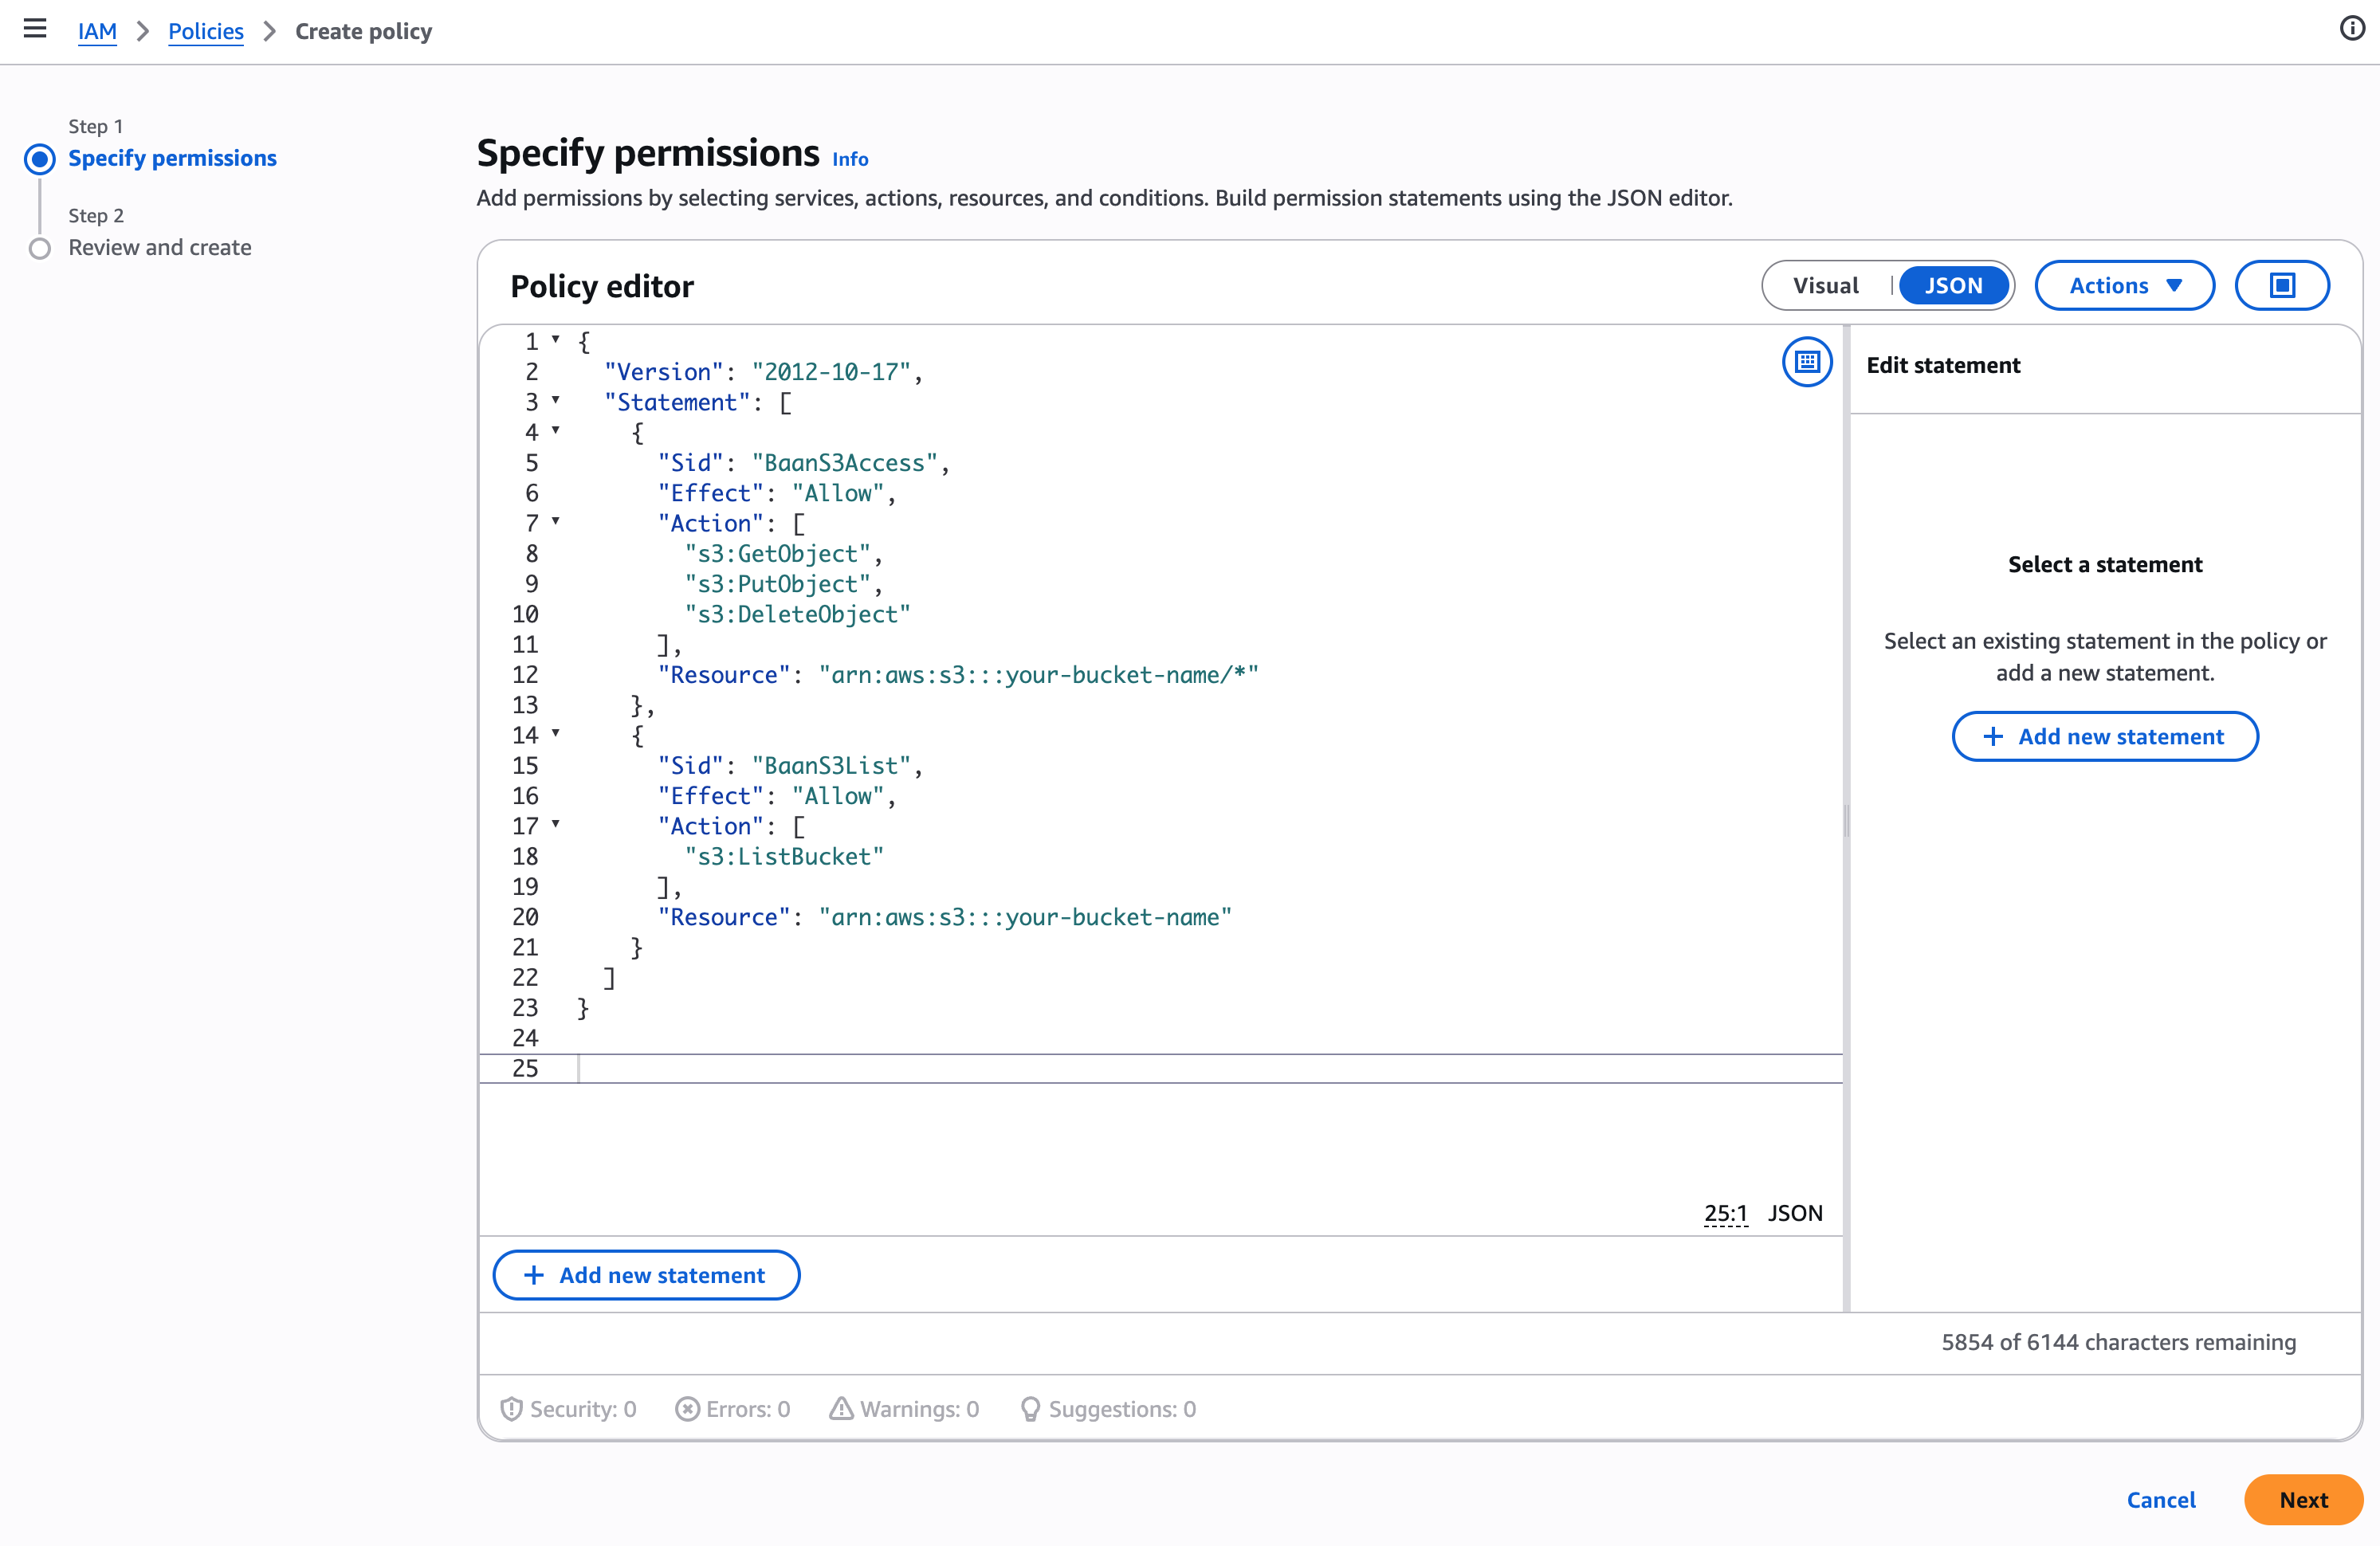
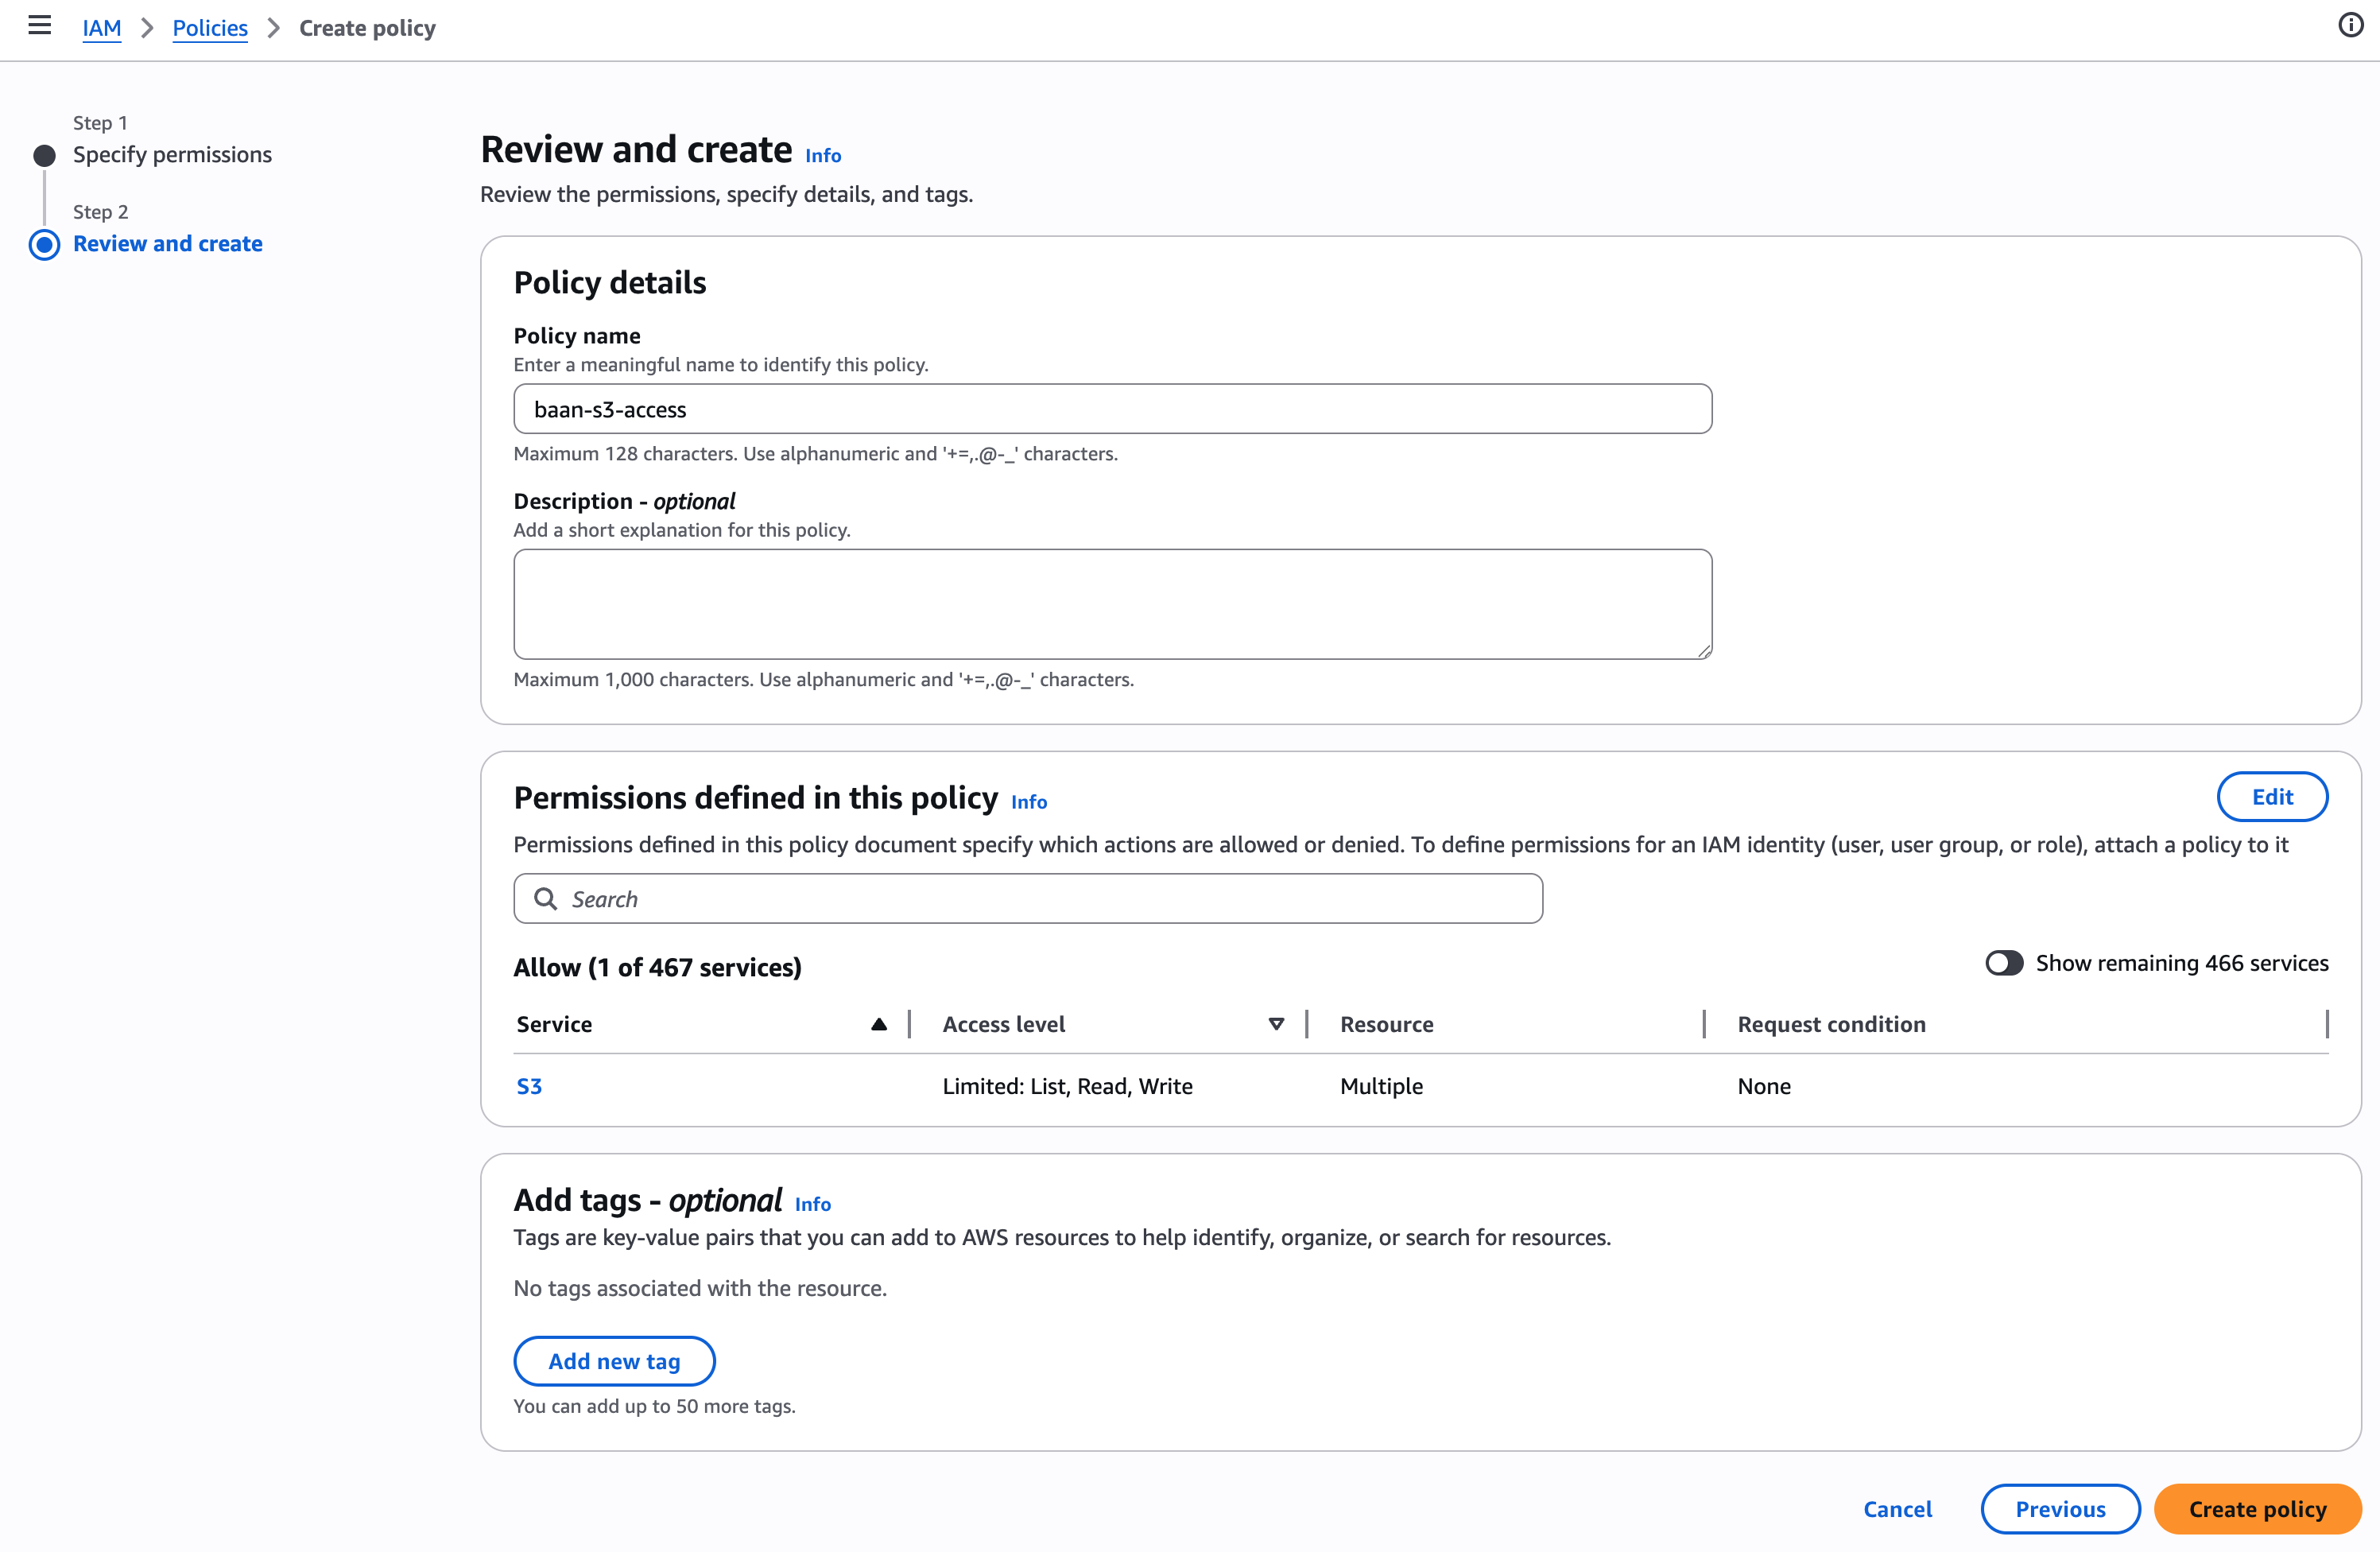
- Click Next → give the policy a name (e.g.
baan-s3-access) → Create policy
Step 2 — Create an IAM User and Attach the Policy
Section titled “Step 2 — Create an IAM User and Attach the Policy”- Go to IAM → Users → Create user — give it a name (e.g.
baan-s3-access)
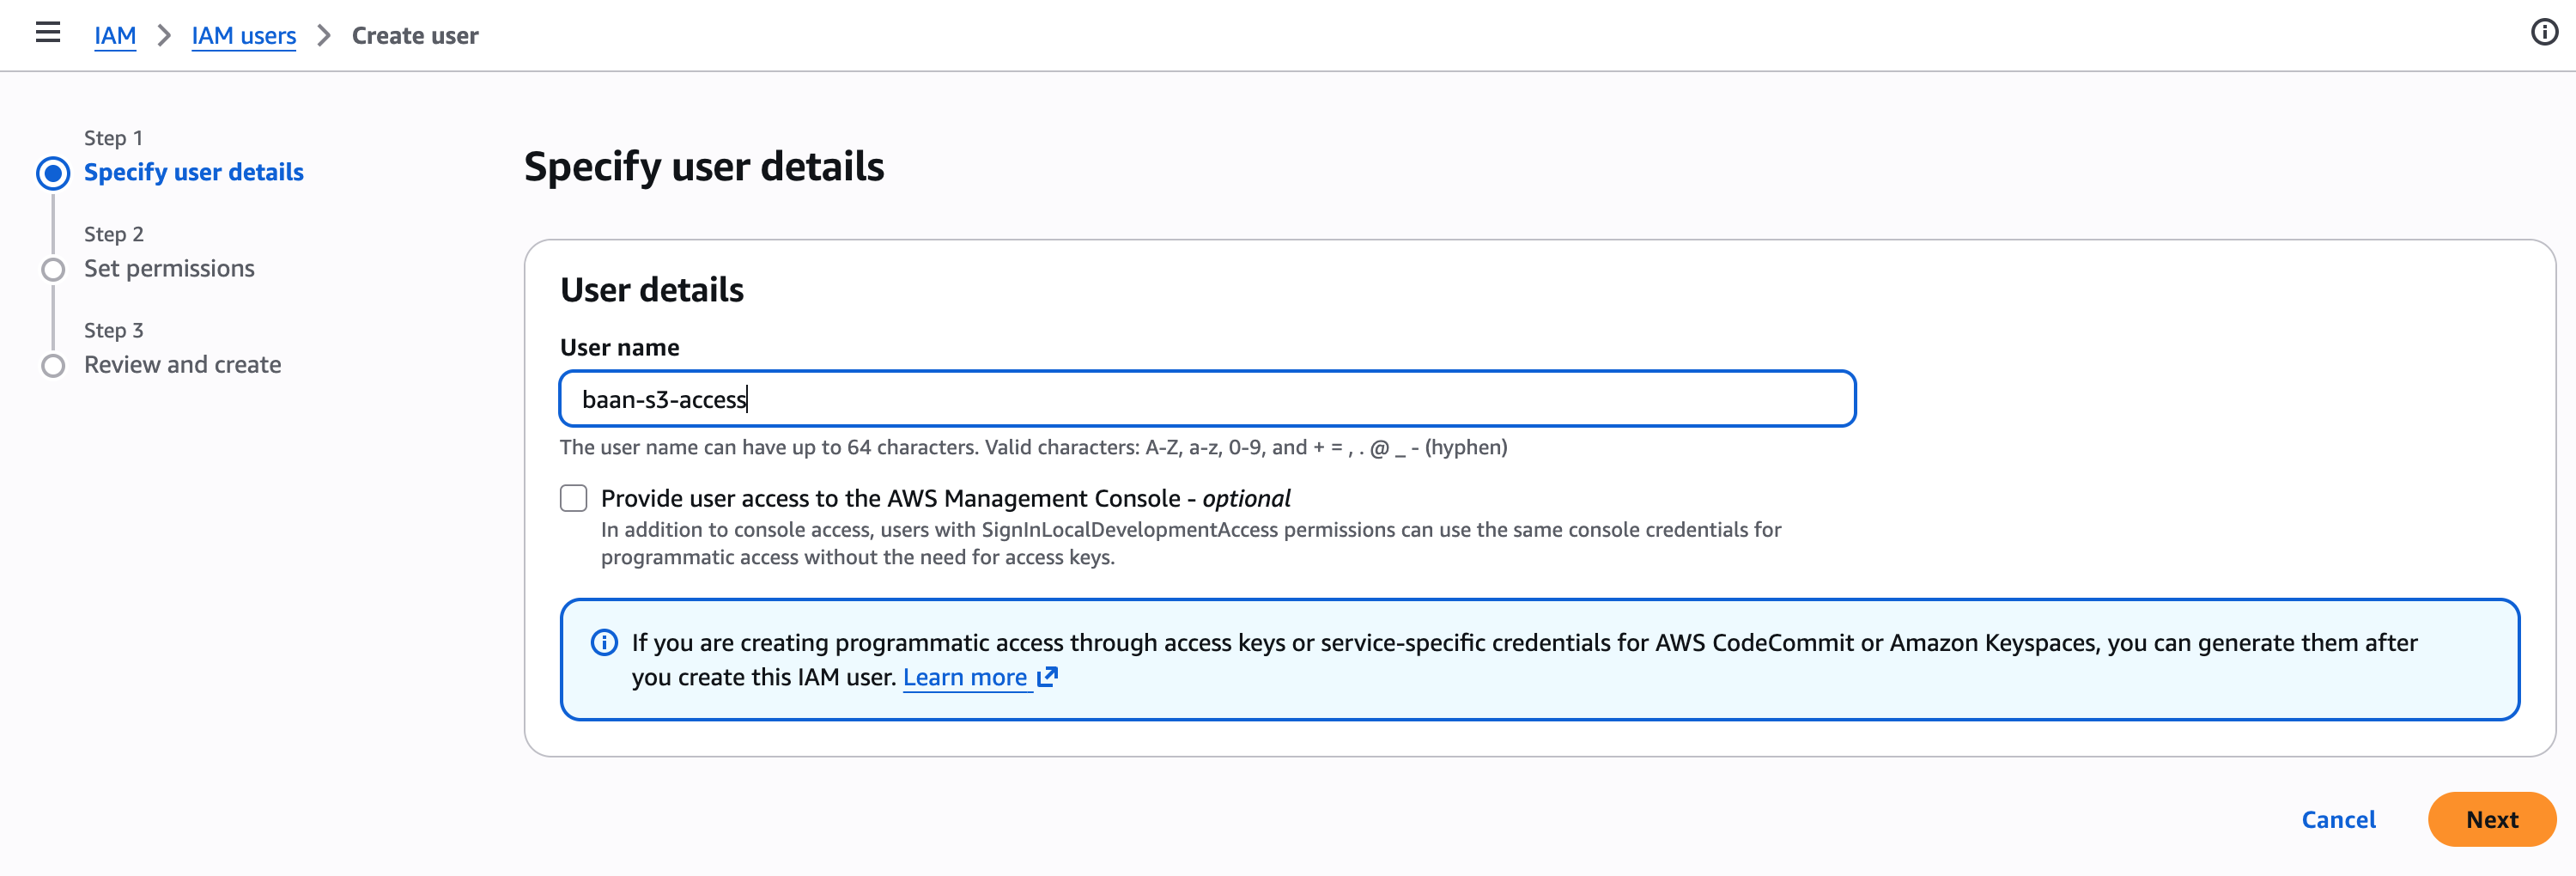
- On the Set permissions screen, choose Attach policies directly, search for the policy you created in Step 1 (e.g.
baan-s3-access), and select it
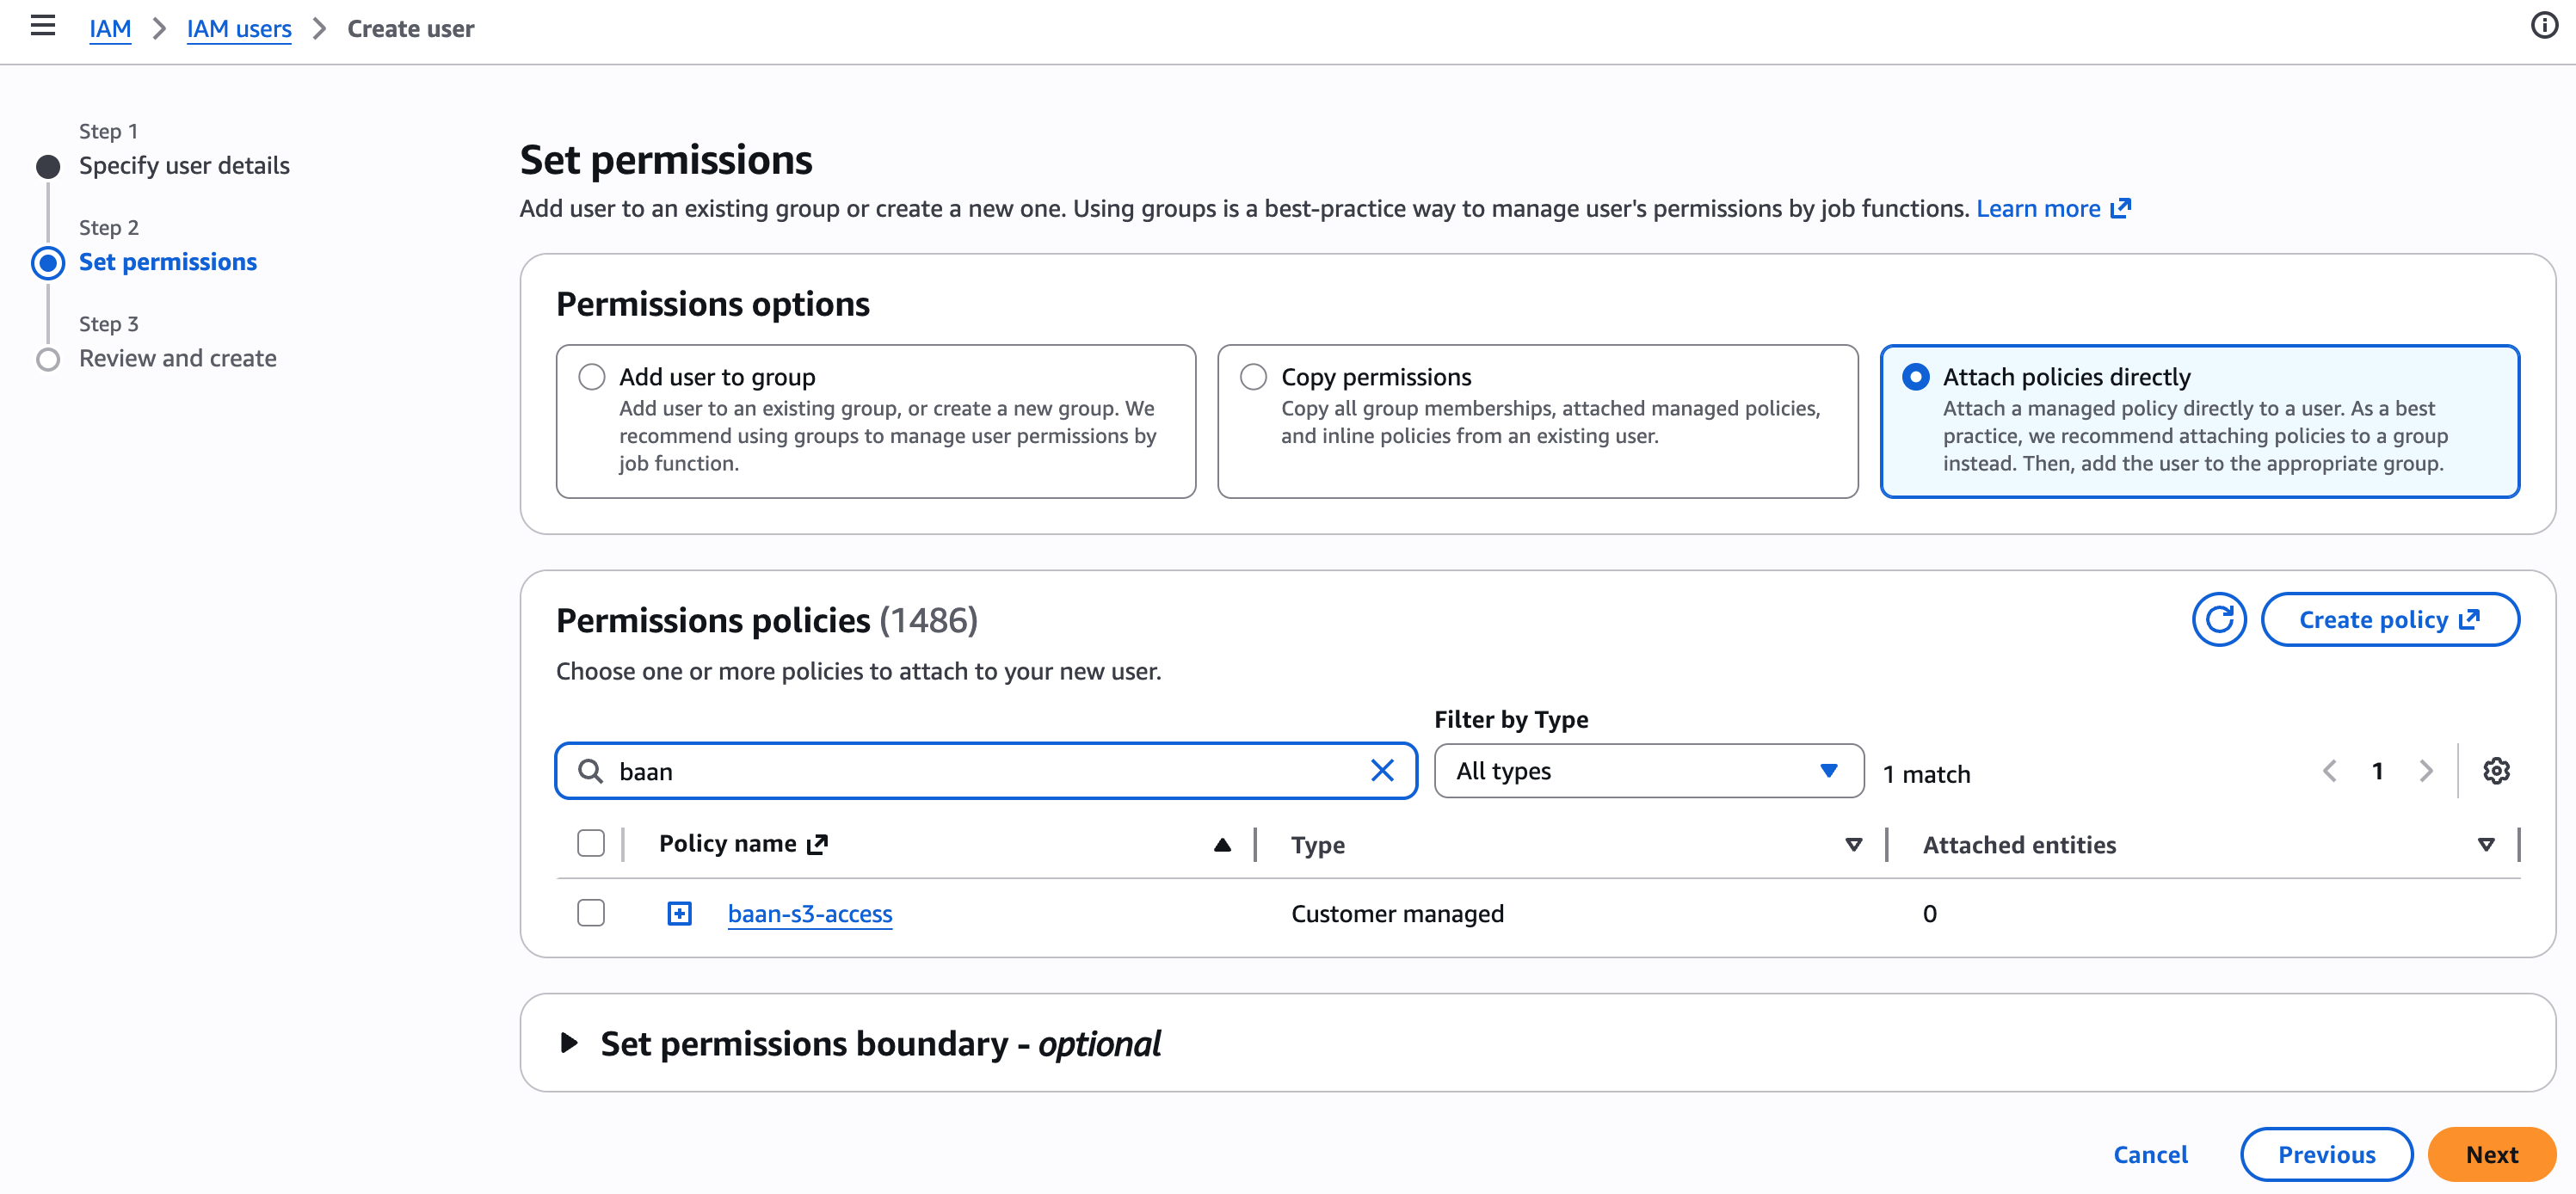
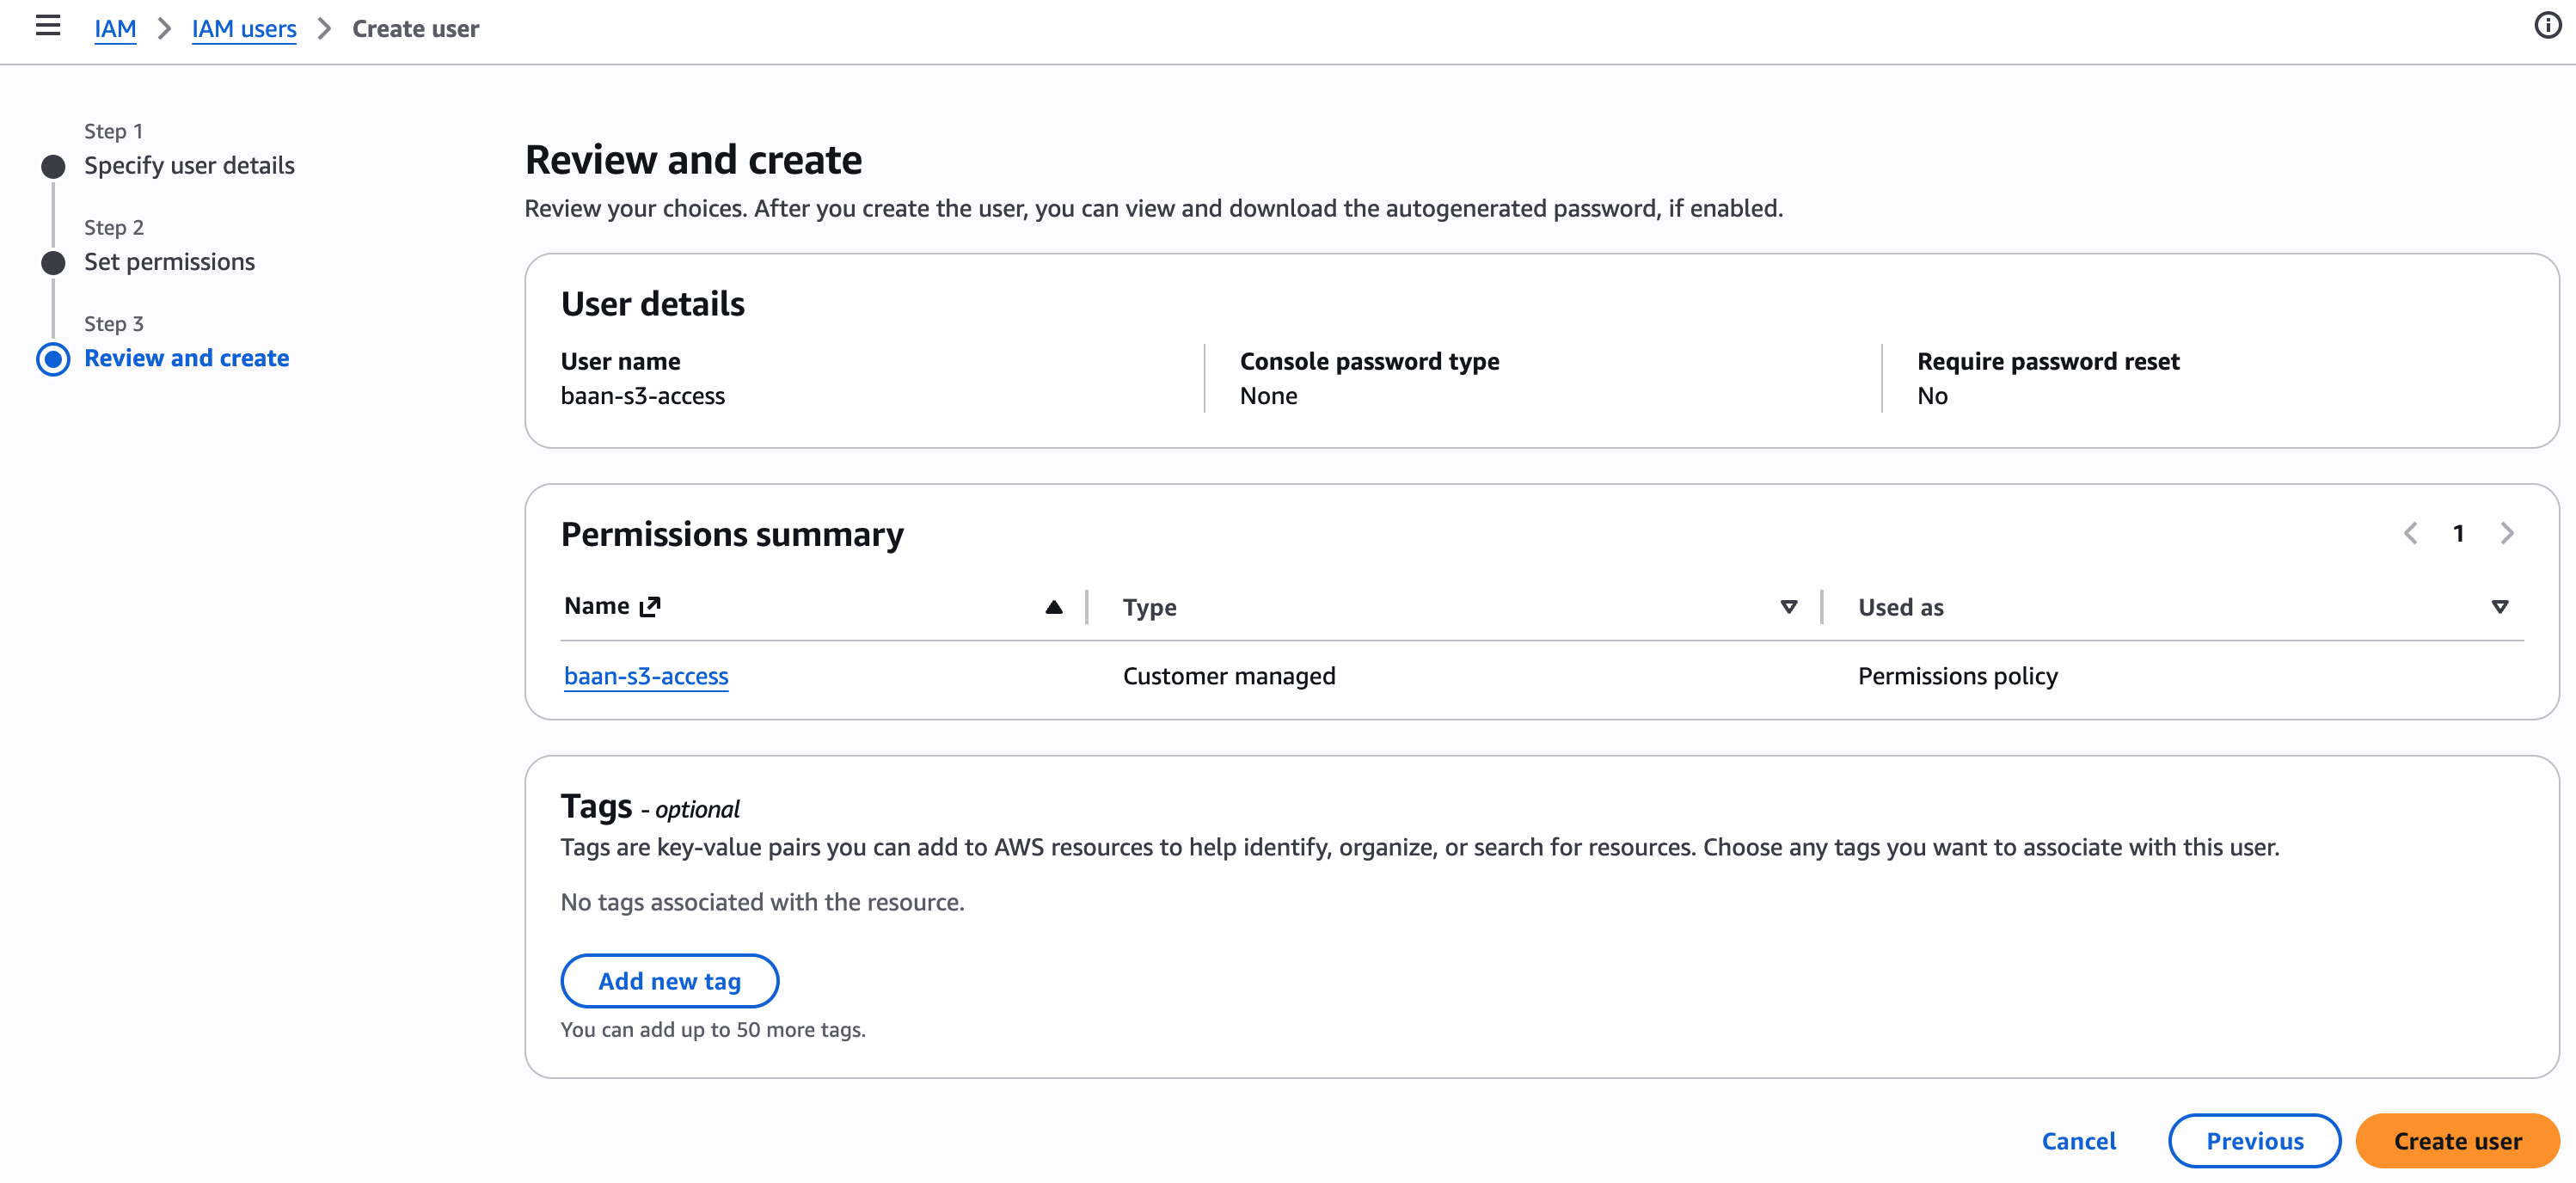
- Click Next → review the user and confirm the policy is attached → Create user
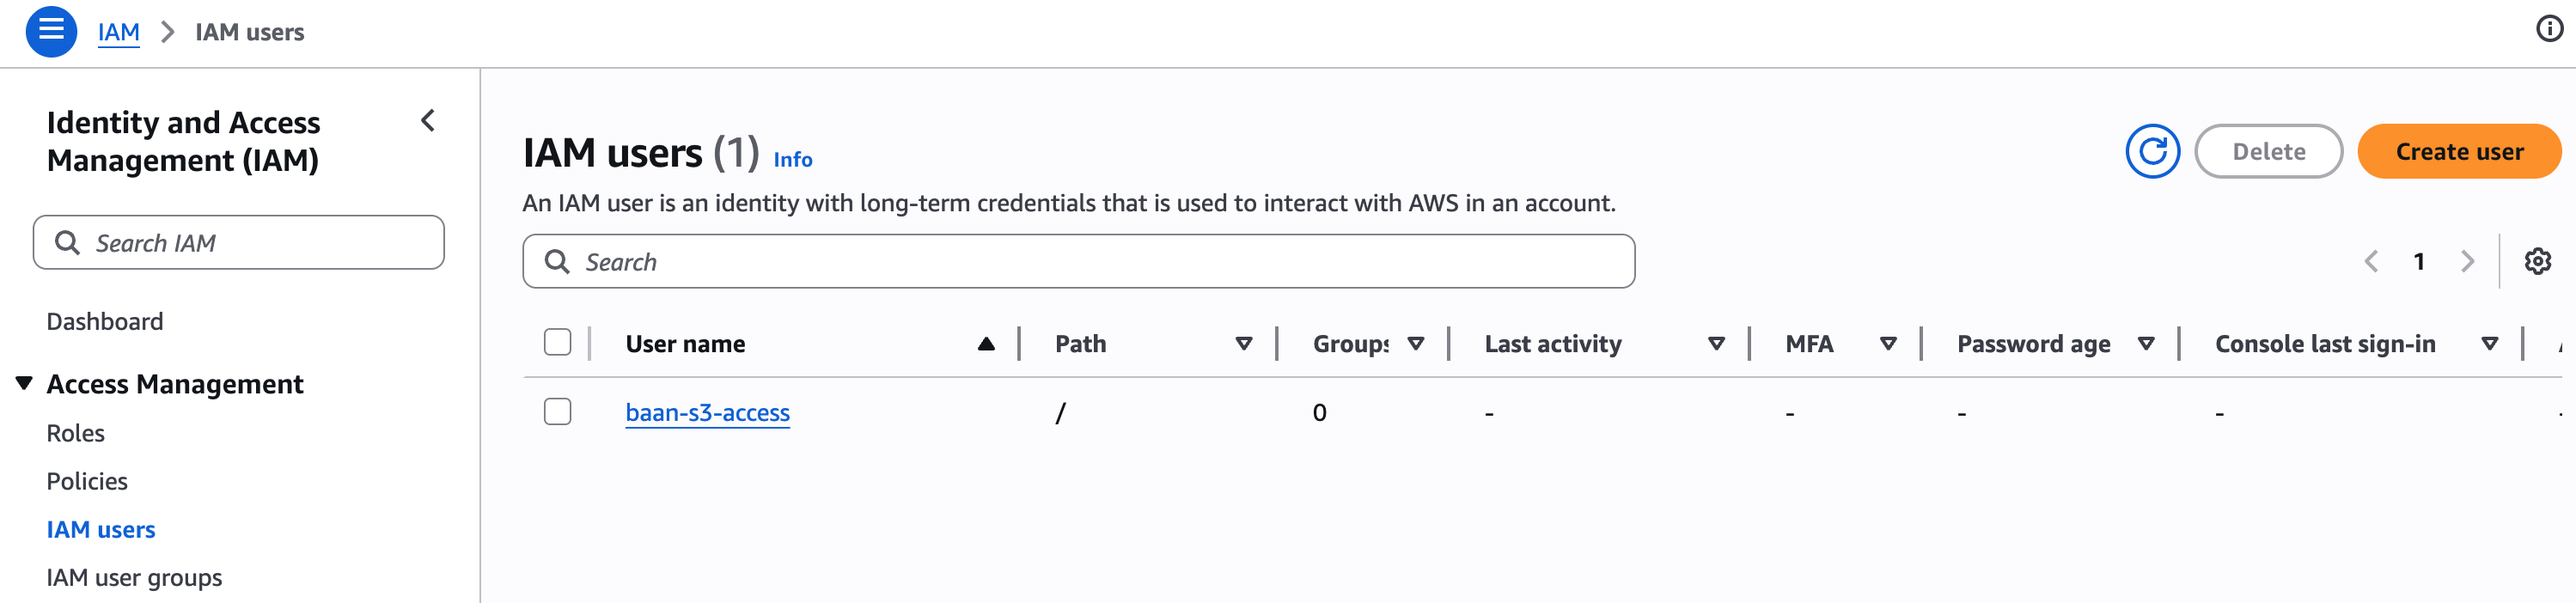
The user appears in the IAM users list once created.
Step 3 — Create an Access Key
Section titled “Step 3 — Create an Access Key”- Open the user you just created → Security credentials tab → under Access keys, click Create access key
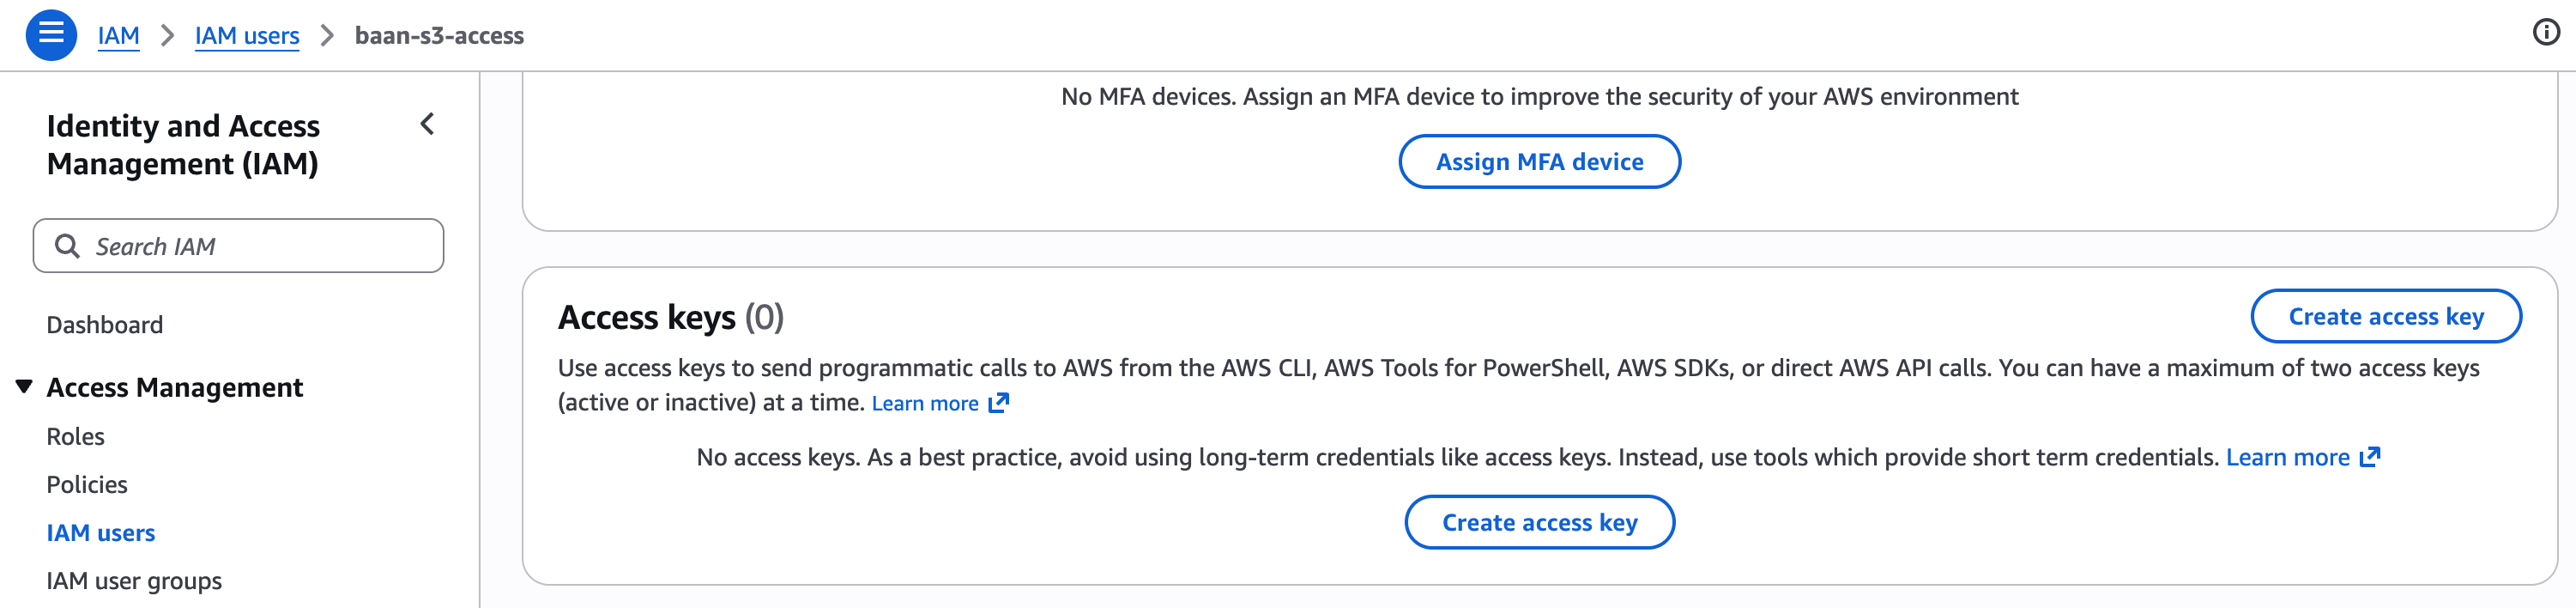
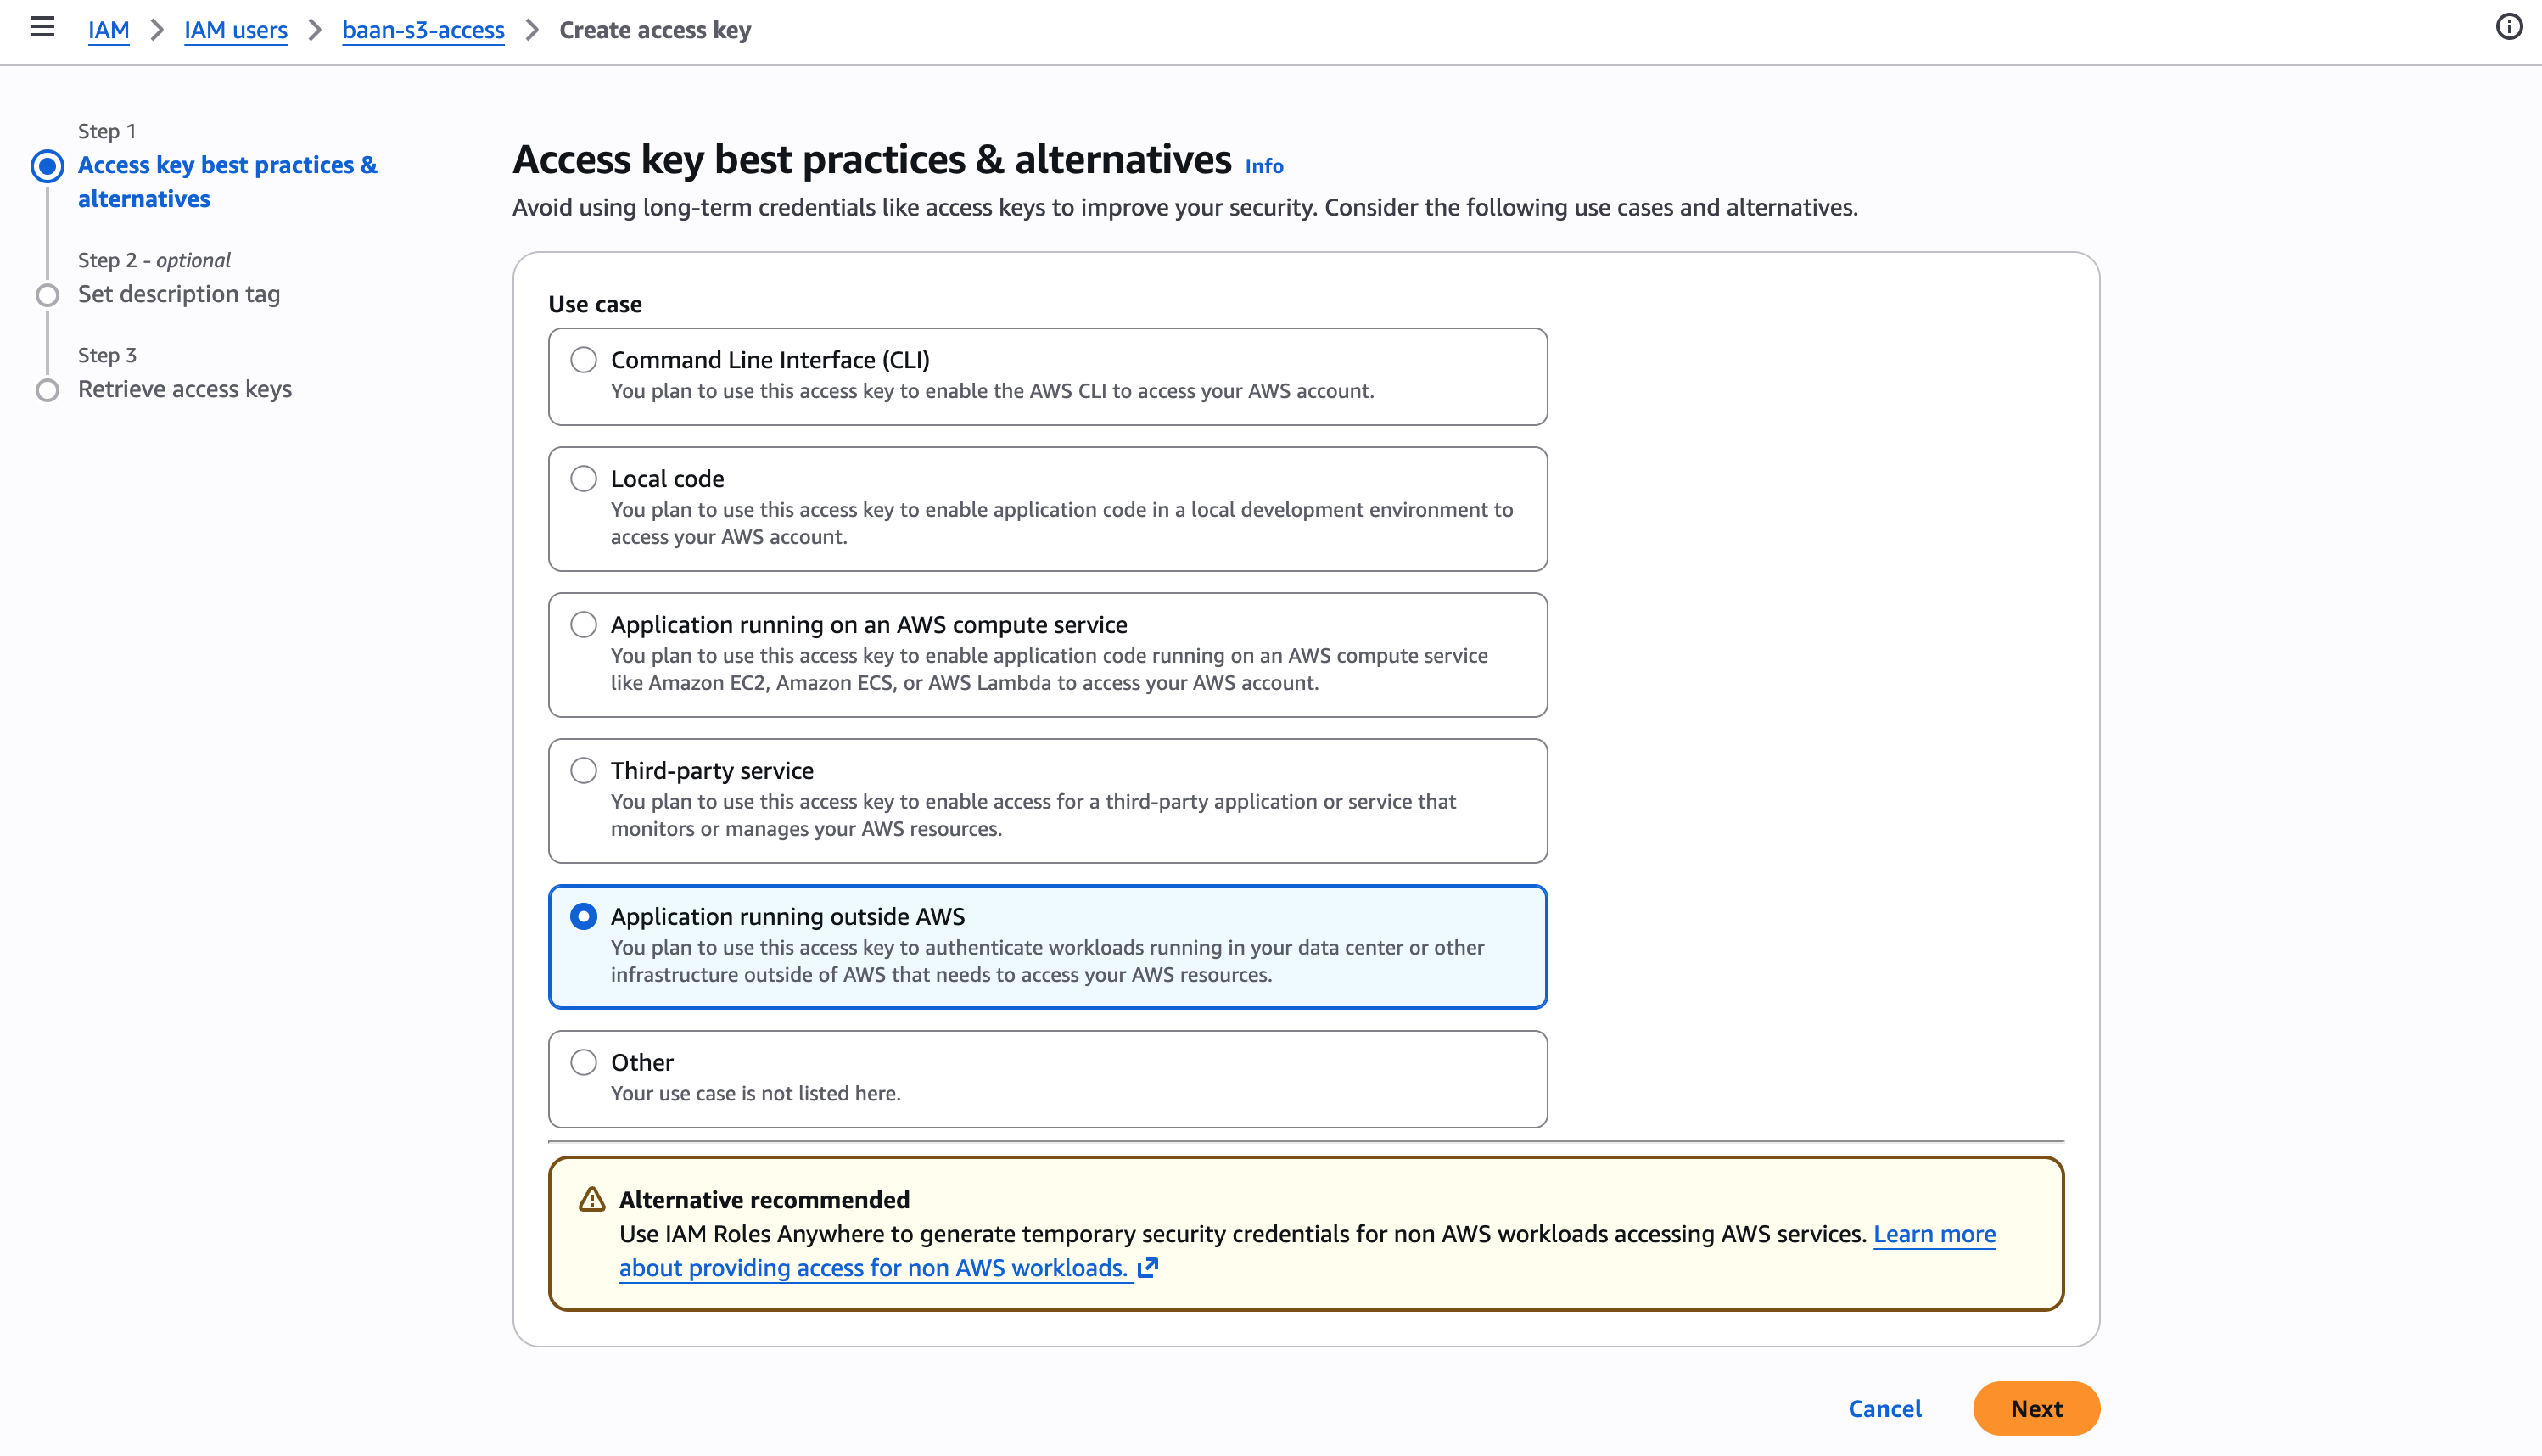
- Select Application running outside AWS as the use case → Next
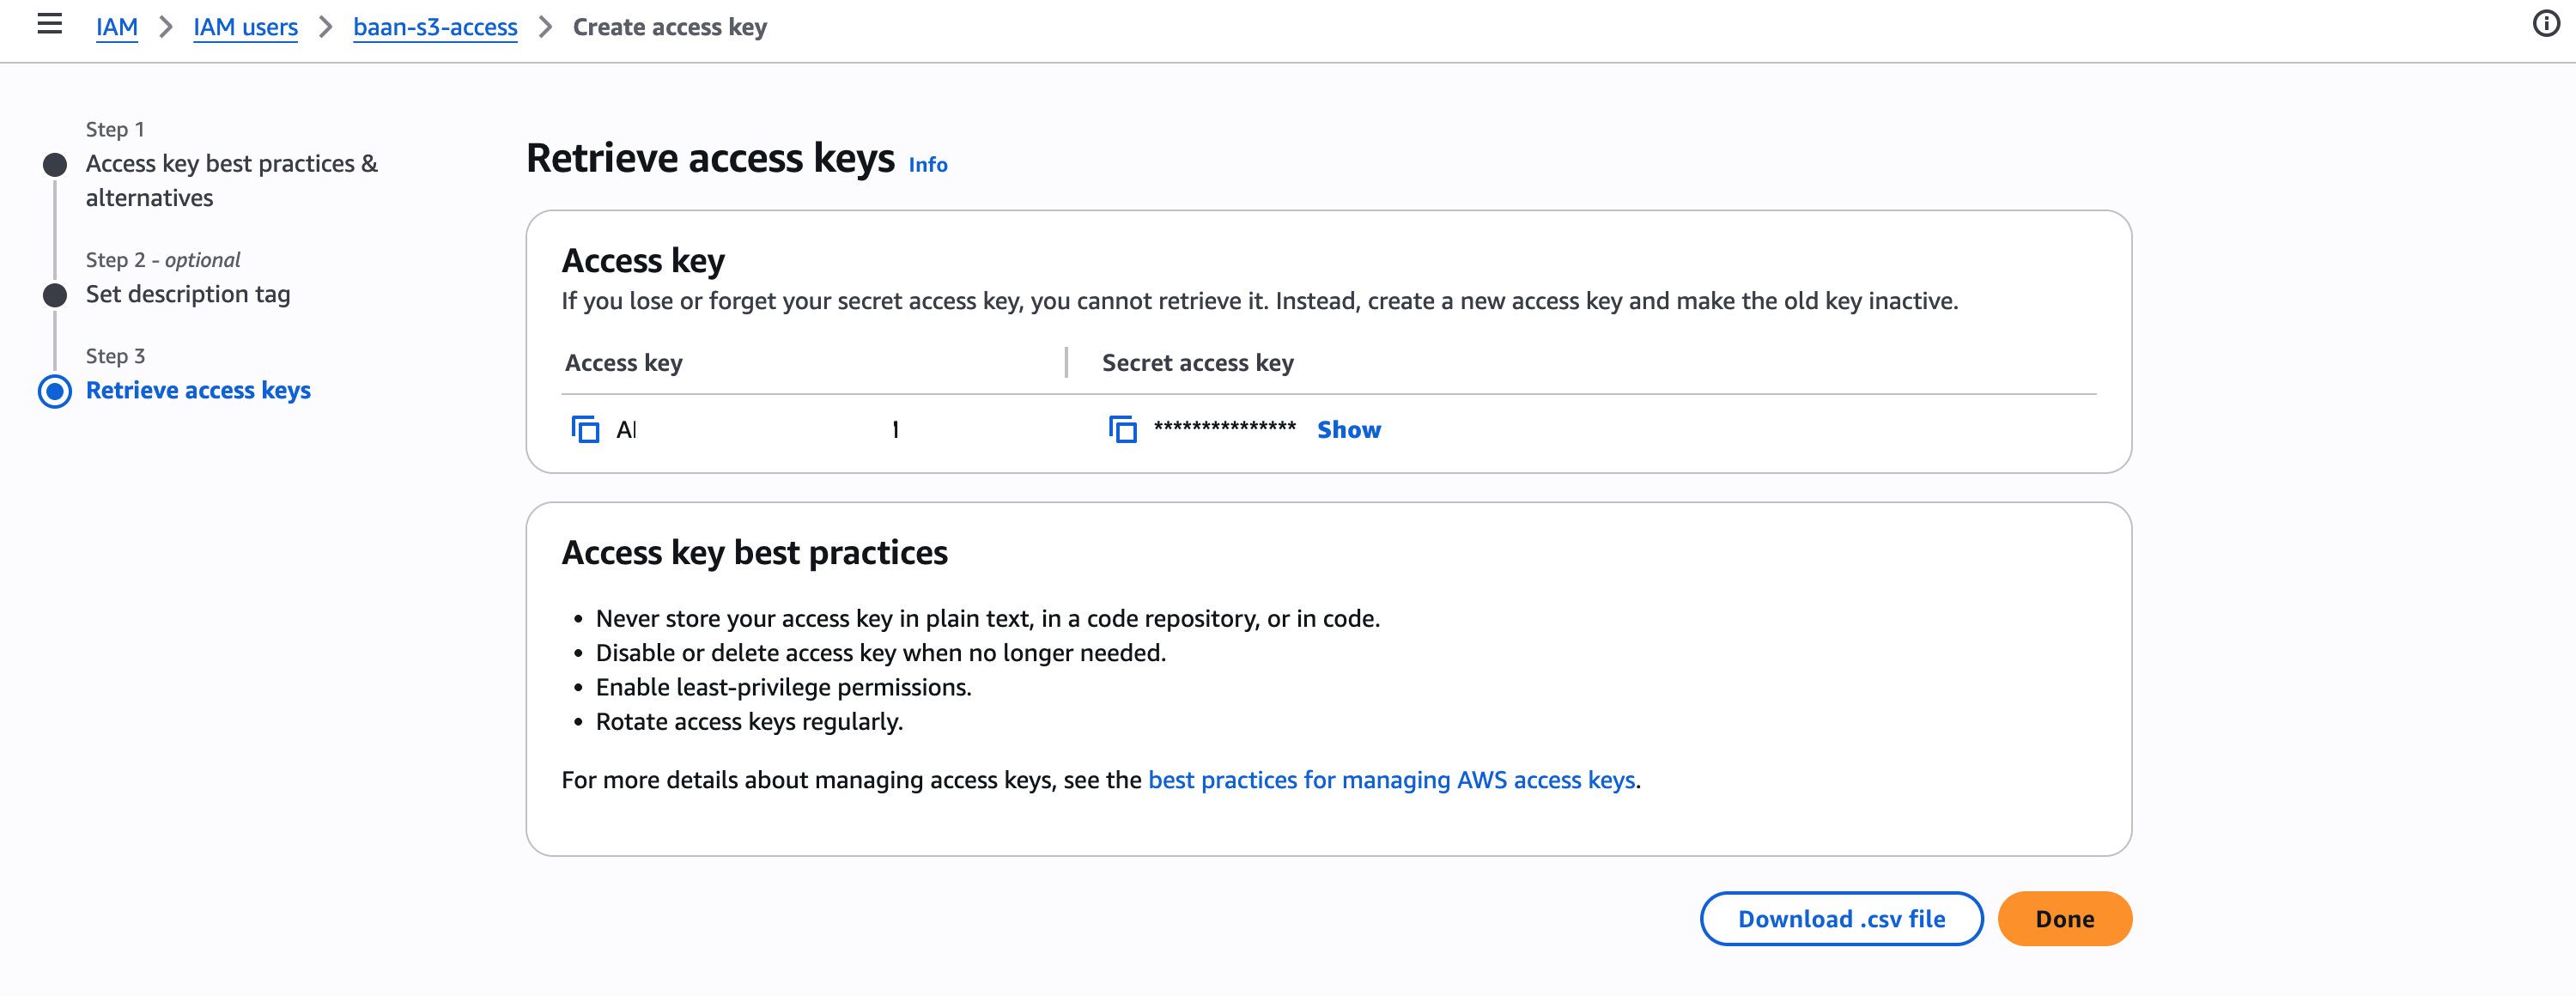
- Save the Access key ID and Secret access key — the secret is shown only once and cannot be retrieved later
Environment Variables
Section titled “Environment Variables”AWS_REGION=ap-northeast-1AWS_S3_BUCKET_NAME=your-bucket-nameAWS_ACCESS_KEY_ID=your-access-keyAWS_SECRET_ACCESS_KEY=your-secret-keyCloudflare R2
Section titled “Cloudflare R2”R2 is S3-compatible and has no egress fees — your readers don’t pay bandwidth costs when assets are served from R2.
Create a Bucket
Section titled “Create a Bucket”- Go to your Cloudflare dashboard → R2
- Click Create bucket
Create an API Token
Section titled “Create an API Token”- In R2 → Manage R2 API Tokens → Create API Token
- Set permissions to Object Read & Write for your bucket
Environment Variables
Section titled “Environment Variables”CF_ACCOUNT_ID=your-cloudflare-account-idCF_R2_BUCKET_NAME=your-bucket-nameCF_R2_ACCESS_KEY_ID=your-api-token-key-idCF_R2_SECRET_ACCESS_KEY=your-api-token-secretYour CF_ACCOUNT_ID is shown in the right sidebar of any Cloudflare dashboard page.
Content Directory Structure
Section titled “Content Directory Structure”Regardless of which provider you use, Baan organizes content in the same directory layout:
content/├── article-slug/│ ├── index.en.md # always index.{locale}.md — e.g. en, ja, fr│ └── images/│ └── hero.jpg│├── another-article/│ ├── index.ja.md # multi-language: one file per locale│ ├── index.en.md│ └── images/│└── _settings/ # internal — do not modify manually └── ...System folders prefixed with _ (such as _settings/ and _auth/) are hidden in the Media Library and managed by Baan automatically.
How Images Are Served to Readers
Section titled “How Images Are Served to Readers”Images referenced in articles are never exposed as direct signed storage URLs in the rendered HTML. Instead, Baan replaces them with stable proxy URLs:
/api/image?path=article-slug/images/photo.jpgWhen a reader’s browser requests this URL, Baan generates a fresh signed URL from your storage provider and redirects the browser to it. The signed URL result is cached server-side for 24 hours — so repeated requests to the same image do not hit your storage API.
When you save or delete a post in the admin panel, Baan clears the image cache alongside the page cache, so updated images appear immediately.
Signed URL expiry (GCS / S3 / R2) is set to 48 hours — longer than the 24-hour server cache — to ensure the redirected URL is still valid for any visitor who lands on a cached response just before it is refreshed.