Deploy to Vercel
Vercel is the easiest way to run Baan in a serverless environment. The file system on Vercel is read-only, so you must use a cloud storage provider (GCS, S3, or R2) and a cloud database (Turso / libSQL). Baan detects the Vercel environment automatically and switches to the right adapters.
What You Need Before Starting
Section titled “What You Need Before Starting”- A Vercel account
- A cloud storage bucket — one of:
- Google Cloud Storage (GCS)
- Amazon S3
- Cloudflare R2
- A Turso account (free tier is sufficient) for the cloud database
Step 1 — Push to GitHub
Section titled “Step 1 — Push to GitHub”Push the Baan repository to your GitHub account:
git remote add origin https://github.com/your-username/your-repogit push -u origin mainStep 2 — Import to Vercel
Section titled “Step 2 — Import to Vercel”- Go to vercel.com/new and click Import Git Repository
- Select your Baan repository
- Leave the build settings at their defaults — Vercel detects Next.js automatically
Step 3 — Set Environment Variables
Section titled “Step 3 — Set Environment Variables”On Vercel you do not create a .env file. Environment variables are entered through the project dashboard, where Vercel encrypts them at rest and injects them into every build and runtime invocation.
- Go to Project → Settings → Environment Variables (see the Vercel docs for the full reference)
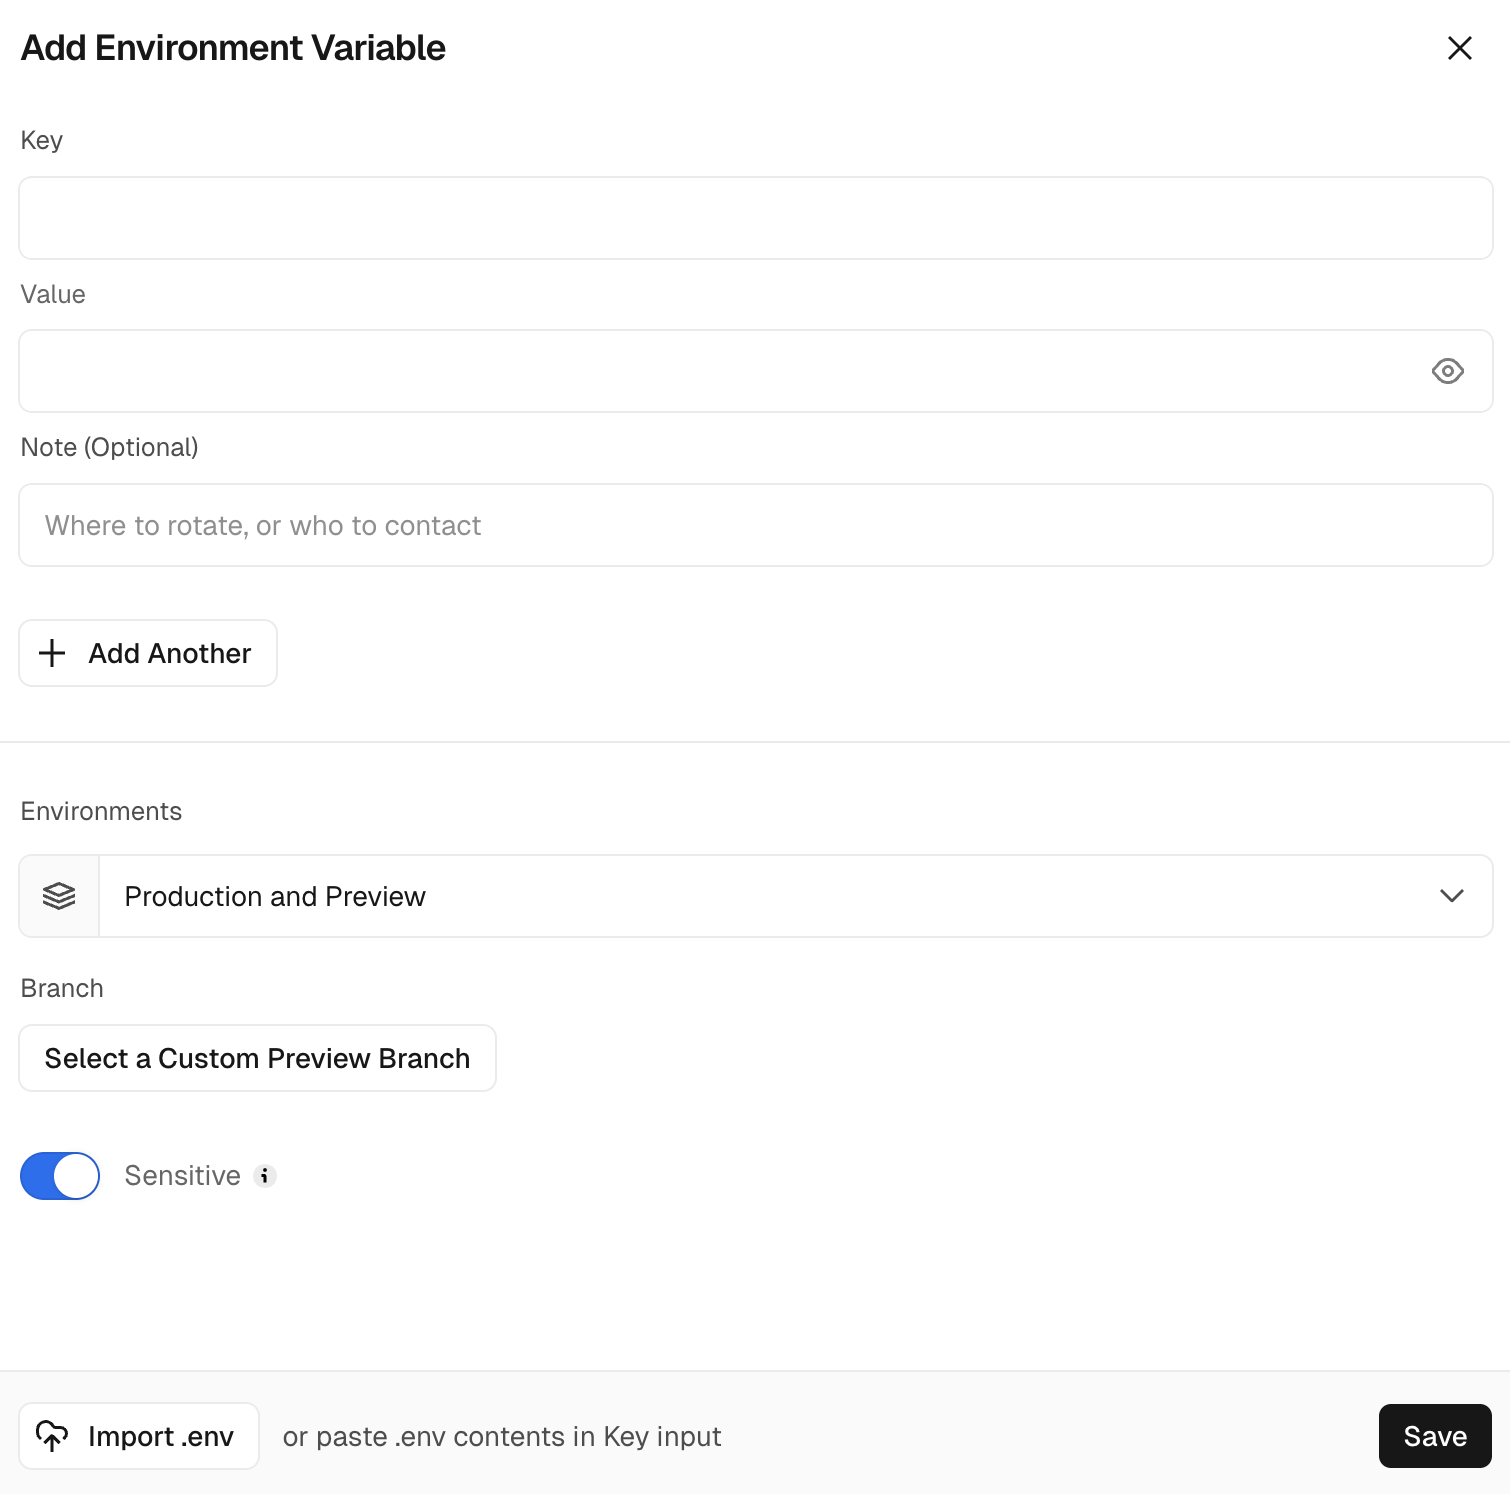
- Click Add New to open the Add Environment Variable dialog shown below
- Enter each variable below as
Key+Value. The dialog also accepts pasting.env-formatted text into the Key field, or uploading a.envfile via Import .env — Vercel parses each line into a separate variable - Set Environments to Production and Preview (Baan needs the same configuration in both), and turn Sensitive on for credentials
- Click Save. Repeat for each variable
- After all variables are added, redeploy (Vercel does not pick up new variables on the running deployment automatically)
Storage credentials (required — choose one provider)
Section titled “Storage credentials (required — choose one provider)”The storage provider type is selected during the setup wizard (Step 4) and saved to the database. You only need the credentials here.
Add the keys for the provider you chose:
Google Cloud Storage:
| Key | Value |
|---|---|
GOOGLE_CLOUD_PROJECT_ID | your GCP project ID |
GCS_BUCKET_NAME | the bucket name |
GOOGLE_CLOUD_CREDENTIALS_BASE64 | base64-encoded service account JSON |
Amazon S3:
| Key | Value |
|---|---|
AWS_REGION | e.g. ap-northeast-1 |
AWS_S3_BUCKET_NAME | the bucket name |
AWS_ACCESS_KEY_ID | IAM access key with the custom S3 policy |
AWS_SECRET_ACCESS_KEY | corresponding secret key |
Cloudflare R2:
| Key | Value |
|---|---|
CF_ACCOUNT_ID | your Cloudflare account ID |
CF_R2_BUCKET_NAME | the bucket name |
CF_R2_ACCESS_KEY_ID | R2 API token key ID |
CF_R2_SECRET_ACCESS_KEY | R2 API token secret |
Database (required)
Section titled “Database (required)”| Key | Value |
|---|---|
DATABASE_URL | libsql://your-db-name.turso.io |
DATABASE_AUTH_TOKEN | your Turso auth token |
To get these values: create a database on turso.tech, then run turso db show your-db-name and turso db tokens create your-db-name.
Step 4 — Deploy
Section titled “Step 4 — Deploy”Click Deploy in Vercel. The first deployment will take 2–3 minutes.
Step 5 — Run the Setup Wizard
Section titled “Step 5 — Run the Setup Wizard”Once deployed, open your Vercel URL and navigate to:
https://your-app.vercel.app/baan-admin/setupThe 4-step wizard will:
- Detect the Serverless environment automatically
- Ask you to create an admin username and password
- Ask you to confirm your storage provider
- Write the admin secret path and user account directly to your Turso database, then redirect you to the login page
No additional environment variables are required after setup — the admin path and user accounts live in the database, not in Vercel env vars.
Step 6 — Log In
Section titled “Step 6 — Log In”Navigate to your secret admin URL:
https://your-app.vercel.app/baan-admin/[your-secret-path]/loginMigrating from Self-hosted to Vercel
Section titled “Migrating from Self-hosted to Vercel”If you have been running Baan locally (with data/app.db) and want to move to Vercel, you need to copy your existing data to Turso before deploying.
What gets migrated
Section titled “What gets migrated”| Table | Migrated | Reason |
|---|---|---|
users | Yes | Admin accounts |
settings | Yes | All site configuration |
refresh_tokens | No | Session tokens — users log in again after migration |
session_secrets | No | Auto-generated on first request |
1. Create a Turso database
turso db create your-db-nameturso db show your-db-name --url # copy DATABASE_URLturso db tokens create your-db-name # copy DATABASE_AUTH_TOKEN2. Run the migration script
From your local Baan directory:
DATABASE_URL=libsql://your-db-name.turso.io \DATABASE_AUTH_TOKEN=your-token \npx tsx scripts/migrate-to-turso.tsAdd --dry-run to preview what will be migrated without writing anything:
DATABASE_URL=libsql://your-db-name.turso.io \DATABASE_AUTH_TOKEN=your-token \npx tsx scripts/migrate-to-turso.ts --dry-runTo migrate from a non-default SQLite file, use --source:
npx tsx scripts/migrate-to-turso.ts --source file:data/my-backup.db3. Add the environment variables to Vercel
DATABASE_URL=libsql://your-db-name.turso.ioDATABASE_AUTH_TOKEN=your-token4. Deploy
Push to your connected branch or trigger a redeploy in the Vercel dashboard. The migration is idempotent — running it multiple times is safe.
Updating Baan on Vercel
Section titled “Updating Baan on Vercel”Push a new commit to your connected branch — Vercel deploys automatically. Database migrations run on the first request after deployment.
Notes on Serverless Behavior
Section titled “Notes on Serverless Behavior”| Behavior | Self-hosted | Vercel |
|---|---|---|
| Storage | Local or cloud | Cloud only (GCS / S3 / R2) |
| Database | SQLite file (data/app.db) | Turso libSQL (cloud) |
| Session secret | Stored in SQLite (session_secrets) | Stored in Turso/libSQL (session_secrets) |
| User management | Admin panel, stored in SQLite (users) | Admin panel, stored in Turso/libSQL (users) |
| Refresh tokens | Stored in SQLite (refresh_tokens) | Stored in Turso/libSQL (refresh_tokens) |
| File system writes | Allowed | Read-only |
Baan detects the Vercel environment via the VERCEL environment variable (automatically set by Vercel) and uses serverless-compatible behavior. Storage and database adapters still depend on the provider and credentials configured during setup.